Ok y’all! I have been wanting to do this project for so long but it is just something we keep pushing back on the list. Now that we have started though, I can’t wait to finish! If you have unfinished builder grade windows and doors in your home, you are not going to believe how a little money and a little time can totally transform the look of a room.
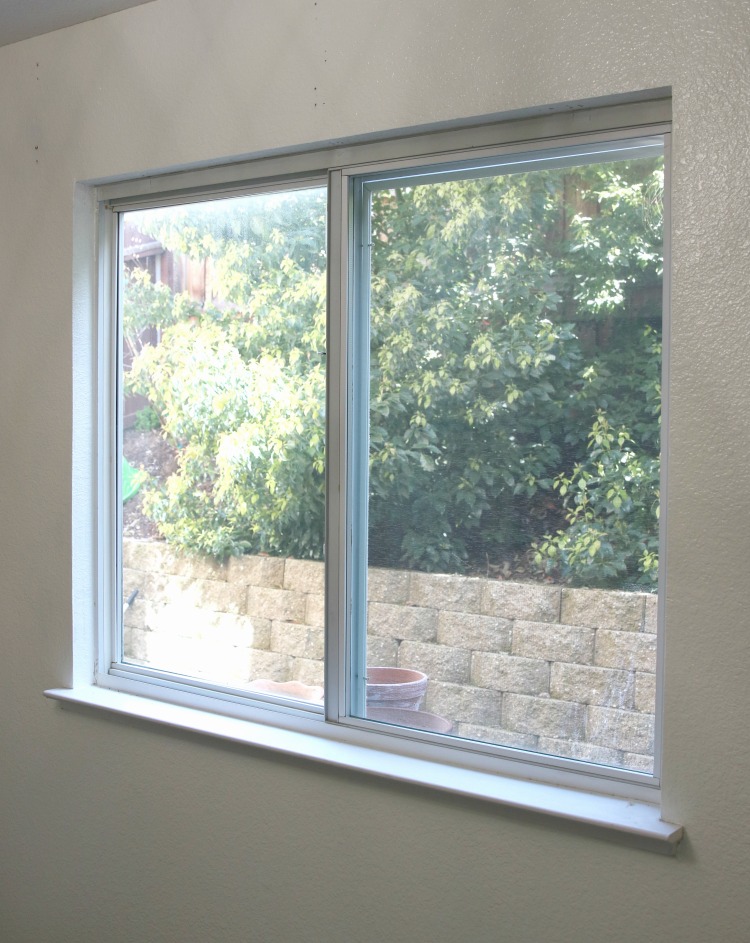
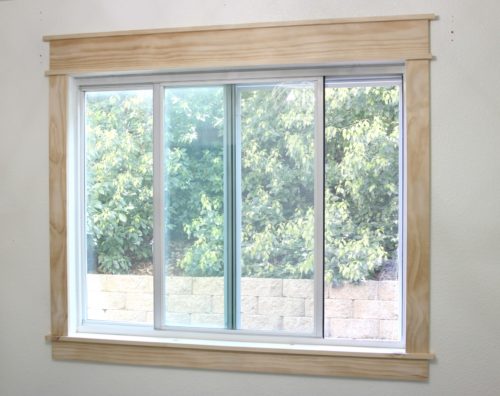
So here is the first window we tackled. This is my office- low ceilings, crappy door molding and no window trim at all. Plus the room only has one window that really doesn’t let in much light due to the huge fence and trees right outside.
I thought this would be a perfect place to start just in case we completely messed it up. Our formal living room, great room and kitchen are all open concept so those we are tackling next, now that we have more confidence in how the transformation looks.
This first window, we used a slightly more expensive premium pine so it did cost a little more to frame out. We spent about $40 total and about 20 minutes time + painting to finish this. So this project is absolutely doable in just one weekend. For subsequent windows, we found a good quality but less expensive wood so the cost per window went down significantly.
When purchasing your wood, you don’t need a super good quality but you do want to save yourself some aggravation by really looking for wood that is as straight as possible. We wound up using a premium pine only because the less expensive wood was so bowed it wouldn’t have made a nice, flat frame.
Ready to trim your windows? Here we go!
These are the materials we used and you will want to take measurements off your windows to get exact cuts.
- (2) 1×2 boards
- (3) 1×4 boards- these are for the sides and the bottom apron
- (1) 1×6 board (for the top)
- (1) 1×4 for window sill
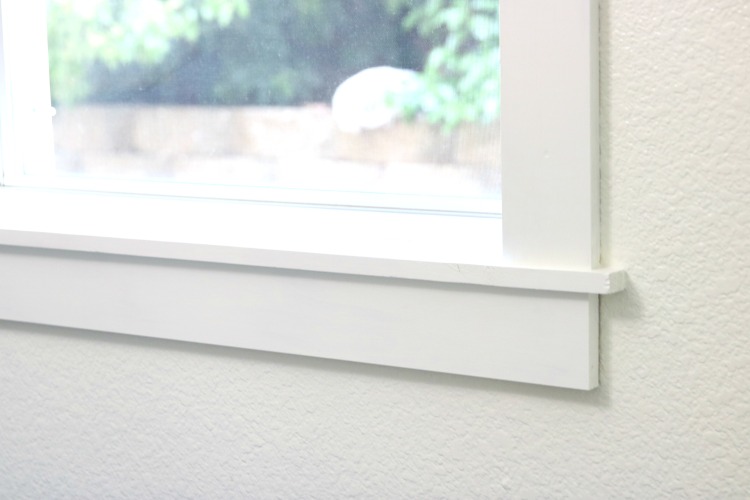
The first step is to take a look at your window sill. You may not need to replace your sill if it juts out enough to match the trim. In our case, as you can see above, the original window sill only extends about 2 inches past the window. We did have to replace it since the trim we used would have been wider than 2 inches.
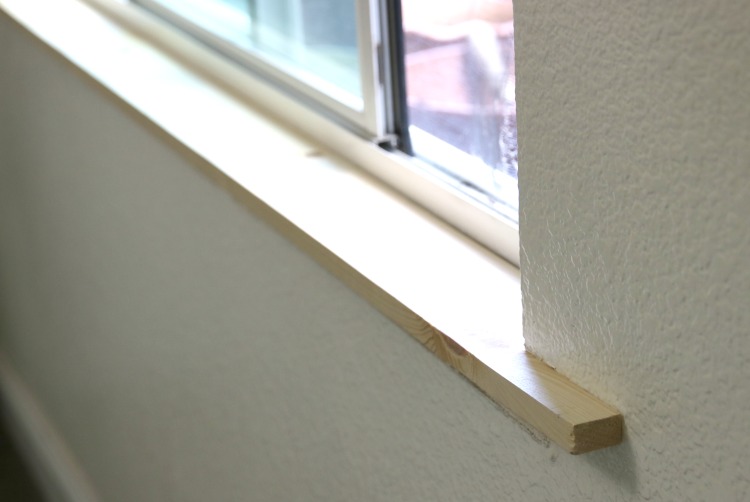
So we started by replacing the sill so it would extend out longer on the sides. This is the only tricky cut you will need to make in this process so if you are lucky enough to not have to replace your sill, you can knock this project out really quickly. We had no other trim around the window but if you have thin trim, just yank it all off.
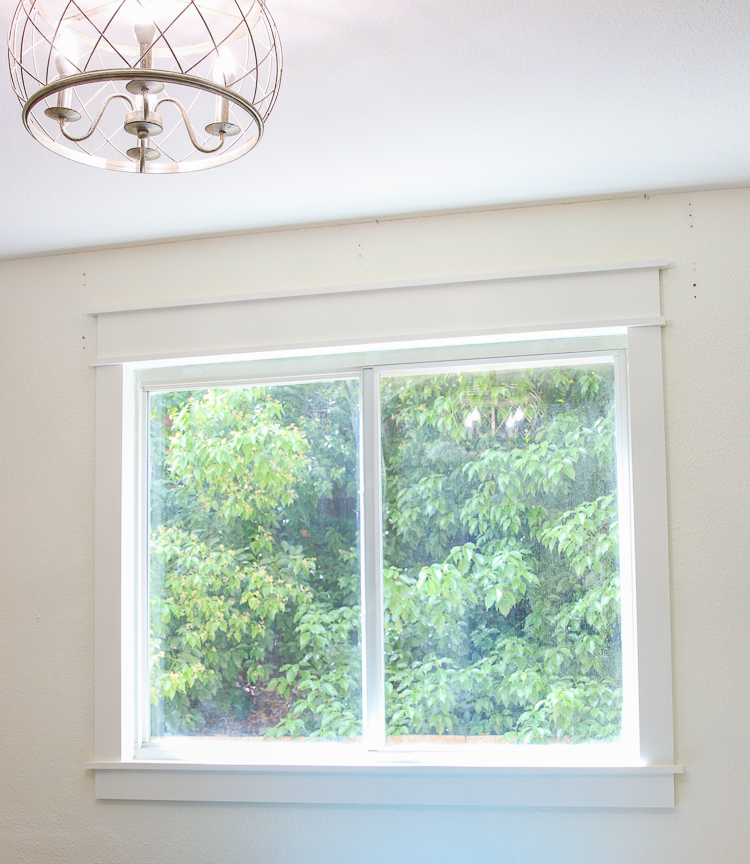
Next up was the side trim. We used 1×4 pine boards- we screwed the boards into place but you can also nail them in. We measured the very top of the window to the bottom to get our measurements and added the side trim.

We used a 1×2 pine board turned sideways right on top of the side trim pieces. The 1×2 was cut about 1/2 inch longer than the side trim pieces for a little extra detail. We used a nail gun to add a few nails from the top of the 1×2 piece into the side trim pieces. We assembled each trim piece right onto the wall but you can also assemble the 1×6 and 1×2 pieces in your work area and mount it as one piece onto the wall.
The next piece is a 1×6 that goes right on top of the 1×2 board. Again we screwed this piece into the wall but you can also just nail it in. The last top piece is a 1×2 that is cut 1 inch longer on both sides. We made this slightly longer than the other 1×2 piece and just nailed down into the 1×6 board to secure it in place.
The last piece is the apron of the window. We added one last 1×4 piece under the new sill and screwed into place.
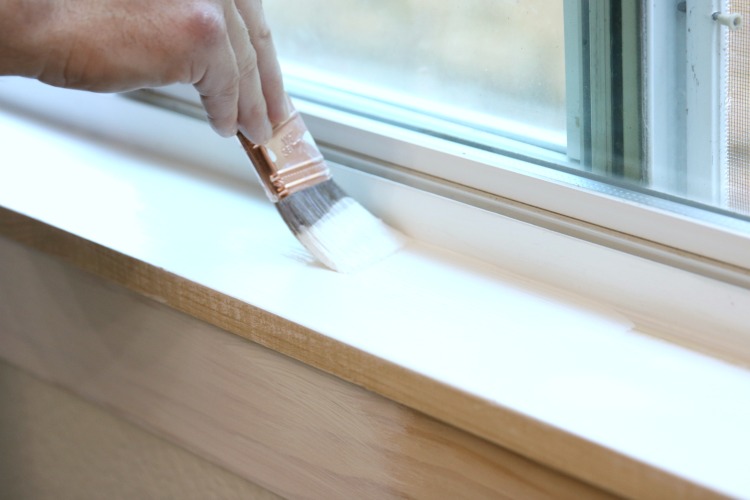
Last we used wood putty on any holes, caulked the seams and painted the trim a fresh white. Done!
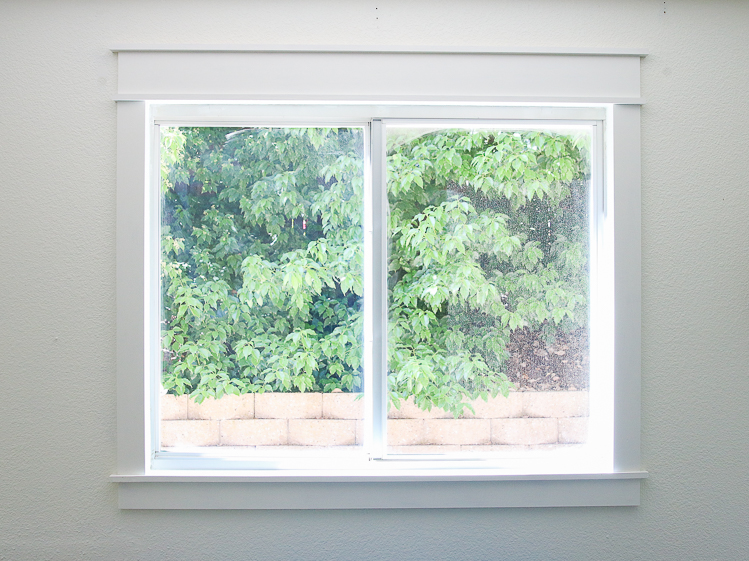
This is such a huge improvement. The walls of this room are a creamy white so it is hard to really see in photos what a difference the trim makes.
And here is how our door trim turned out. This was tricky due to the window on the side and above the door.
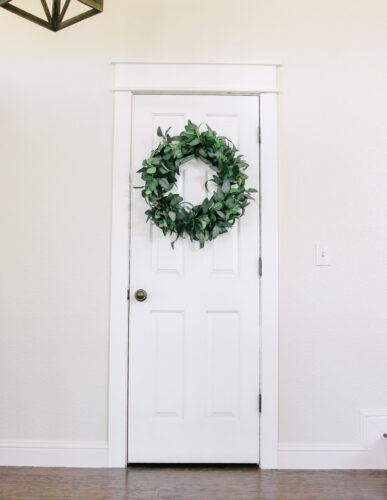
And one more example of our trimmed out closet door. Such a big difference.
If you have any questions please leave a comment below!
Here are a few other ideas you might also like for simple DIY projects to update your home:

Hi Charlene,
I just moved to San Rafael, and our windows and closet doors look exactly the same as your window did. I love what you did with your windows! Did you do your closets too? If so, do you have any pictures? I’m trying to convince my husband that we can fix ours up without spending too much money 🙂
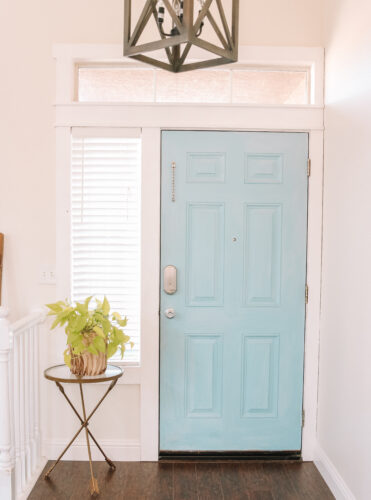
Hi Ellie- I worked at Brown Forman for a few years in San Rafael! Such a beautiful place but I don’t miss that traffic at all. 😉 I do miss that job though and Marin County too. I hate to say but it does kind of add up because there are so many doors and windows in a house. 🙁 We have been doing ours room by room because of time and cost so maybe you could just try one room like the master bedroom and see what he thinks? We did do our front door, kitchen entryway and a closet door. Let me take some photos and add them to this post. It might take me a few days so maybe check back Thursday? I think it is really worth it but sometimes other people don’t see our vision and take a little convincing. Ha! Good luck,
Charlene
Ellie my apologies for the delay. The door pictures are up now though.