
Do your kids love perler beads? Mine do! They are so fun and inexpensive and the possibilities of things you can create are endless.
If your kids were really into Rainbow Looms (or still are), you might introduce them to these and see if they love them as much as we do.
My 7 year old makes so many fun things (in fact I have another adorable project from her coming soon) and her little sister is always getting into the perler bead stash so we actually just got a second set of these for my 6 year old for her birthday.
We were trying to think of fun things to make for summer and I saw this gorgeous IG photo from a talented German blogger:
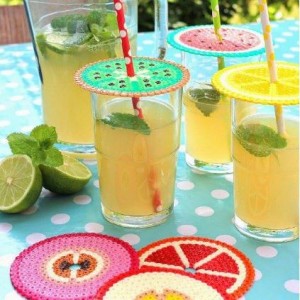
In this photo, the person made drink toppers to keep bugs and other things out of drinks. There weren’t really clear instructions on what she did but I loved the idea and wanted to make fun coasters in a citrus/fruit theme for by the pool this summer. Wouldn’t these be a fun hostess gift or Girl Scouts project or just something to keep little fingers out of trouble once school is out.
Ok so for this project you just need a few things:
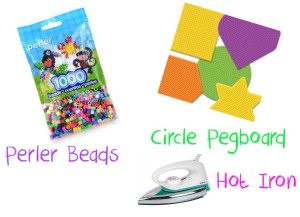
- Assorted Perler Beads- you can buy these at Walmart or craft stores or online here from Amazon. Make sure you get the correct colors for your project.
- A circle pegboard- you can find these at the stores above or ours came with one of the kits.
- Iron
So you simply place the perler beads in the proper shape on the pegboard, your beads will come with a little piece of paper to use in between the iron and the beads and you iron the beads to make them stick together. So easy!
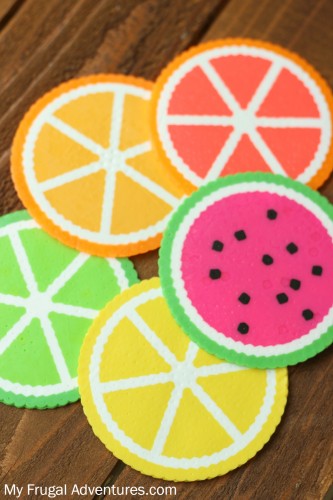
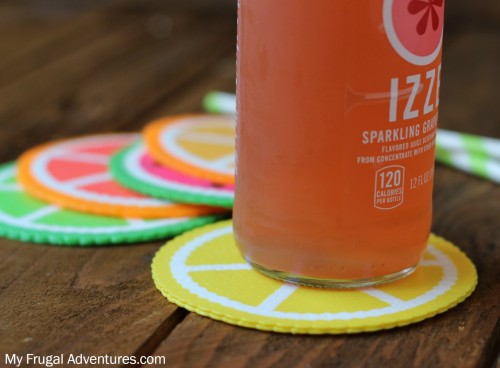
So for our coasters, we did Lime, Lemon, Orange, Grapefruit and Watermelon. Perfect for summer!

Here is the layout for the citrus fruits. My little girl and I used yellow and white for lemon, green and white for lime, pink, orange and white for grapefruit and orange and white for oranges.
We used the exact same layout for each citrus coaster and just changed out the colors. In this one, I used a bright lime green for the center pieces, white for the sections and the pith and then a darker green color for the rind. For lemon I used all yellow, for orange I used a light orange for the center and the rind is a darker orange and lastly the grapefruit was a pinkish/peach color with the rind being orange.
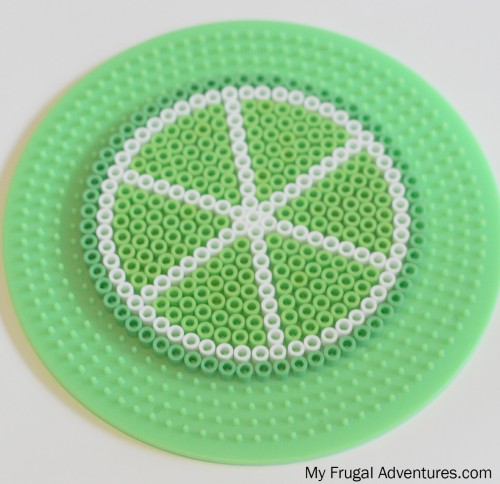
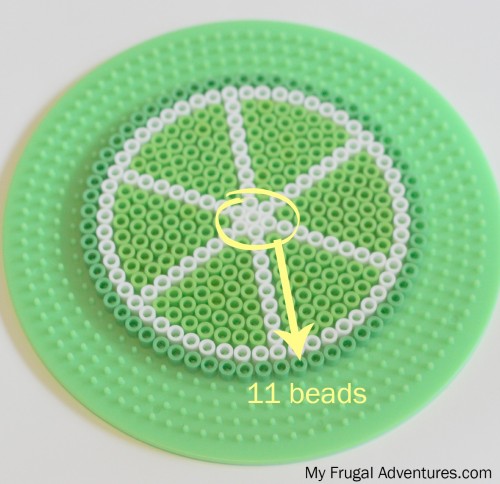
I found that 11 beads in total from the center point out gave me a perfect size coaster- so to start you will add the center white bead, the six beads surrounding the center and then we did the white lines straight out. To clarify again including the center bead there are 10 white beads going in a straight line and then the dark green rind makes 11.
Hopefully this gives you a better idea:
Sometimes the beads and the peg boards can vary a little in size but for the ones I used this worked perfectly. Once we put the white lines out, I did the white circle around and filled in the sections with the colored beads and finished up with the rind circle.
For the watermelon, I followed a similar pattern- adding 6 bright pink beads to the center and creating one line of pink beads 9 long. Next I added the white bead which is the pith and the darker green for the rind. Walmart toy catalog may help you with choosing the best gift for Christmas. I made the white circle, green circle and then went in and filled the center completely with bright pink. To add the black seeds I just eyeballed it and every so often popped a black bead in. Super simple.
Then I grabbed the little sheet of ironing paper included in the perler beads (or use parchment paper if you lost it) and press firmly down to melt your beads so it becomes one piece. Allow that to cool until you can handle it and flip it over, put the paper on top of the perler beads and iron again.
Once you are done ironing, I like to set something hard on top like a candle or a mug or book just to be sure the coaster stays completely flat as it cools down and doesn’t curl on the edges.
And boom! You are done! Please be super careful transporting the perler beads from your work station to the iron as a tiny twitch of the arm will lead to 8 zillion beads on the floor and possibly some 4 letter words and/or tears 😀
These coasters are so fun and they will be fine in the rain if you do leave them outside but I would caution about leaving them outside in really, really hot weather. I haven’t tested it yet but I suspect they might curl up and lose their shape in extremely hot climates if left outside.
And if you want to use these for a drink cover instead of a coaster, simply leave out the center portion that is circled in the photo above. That will give you plenty of room for a straw to fit through.
And here are a few other crafts you might like:
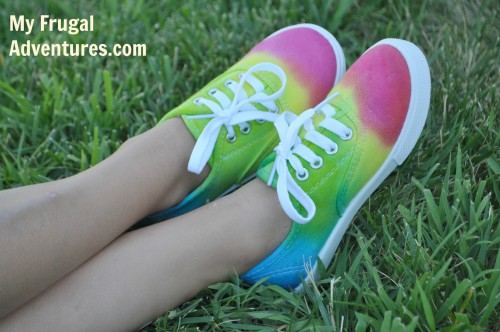
Adorable Rainbow Tie Dye Shoes
Grapefruit and Mint Sugar Scrub
My kids loved these things! TheY would occupy themselves for hours!
This is so cute!!! I had no idea that those beads squished down into flat-ness. I have always thought they made crafts that had the pixel-likeness. This is great! I know my little boy will love making this for his teacher for end of year gift. Thank you!
Hi Stacy- wouldn’t an apple be fun for a teacher? I personally like to squish them super flat by applying pressure with the iron. I have seen other kinds of perler where the bead is just barely ironed and left more intact. 🙂
Thanks for sharing this- I made some and LOVE THEM! I was inspired by yours to also make a blood-orange one and a pomelo one.
Cute Destiny!
In this photo, the person made drink toppers to keep bugs and other things out of drinks. There weren’t really clear instructions on what she did but I loved the idea and wanted to make fun coasters in a citrus/fruit theme for by the pool this summer. Wouldn’t these be a fun hostess gift or Girl Scouts project or just something to keep little fingers out of trouble once school is out.