
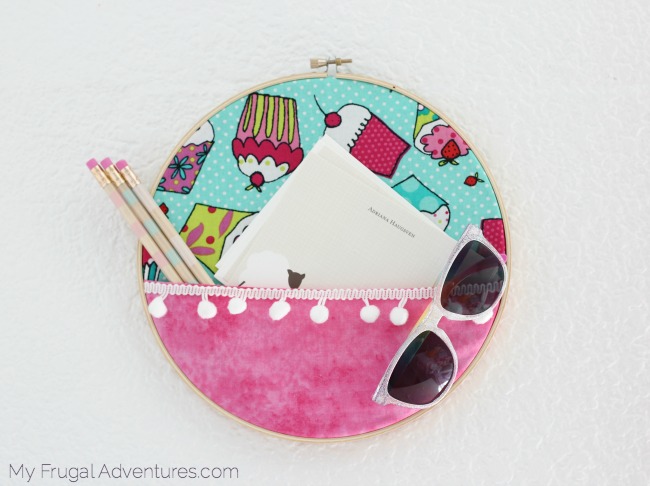
This easy embroidery hoop project is so simple and quick to make. It adds a fun pop of color plus provides a little extra storage space. You can make these with holiday themes to hold holiday cards, in a baby’s room to hold little notes or special photos, over a desk to hold office supplies… the possibilities are endless.
I had an embroidery hoop left from a project ages ago and I have been wanting to make something like this for my daughter’s desk. I can’t stand clutter on the desk so this helps a bit with that problem and also is a little something to dress up the narrow strip of wall in front of her desk.
I love how this turned out and I actually plan to make a few more to add to this space in the near future.
Currently the hoop holds a few pencils, her thank you notes and some sunnies that she always seems to forget when they are tucked away into a drawer.
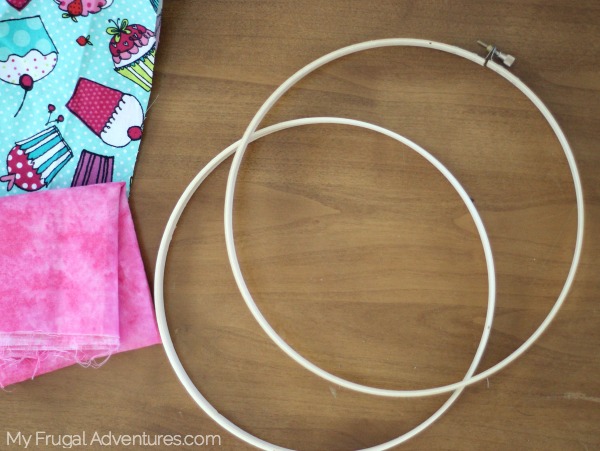
Here is how to get started- you simply need to purchase:
- Fabric of your choice or burlap or felt
- Trim of choice (optional)- tassels, felt balls, mini pom poms, ribbon etc..
- Embroidery Hoop in the size you want from a craft store or grab one here online
- Glue or a hot glue gun
And that is seriously it! I didn’t even have to hit the craft store and just used supplies we already had on hand.
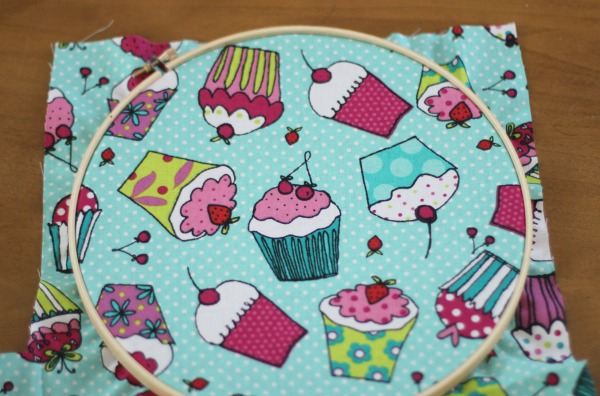
Start by placing your primary fabric on top of the inner hoop and on the bottom of the outer hoop. Press down to secure the fabric in between the hoops. Roughly trim the fabric around the hoop – about 1 inch wide. You want enough just enough fabric to glue around that inner hoop at the end but not too much to make the project messy.
Take your second piece of fabric for the pocket and place that where you want it on the hoop. If you are using a thick fabric or felt, just one layer is fine. I am using a thin cotton so I folded my fabric over and ironed a crisp fold to make the pocket a bit more sturdy.
In my example the pink fabric is folded over and ironed and then I placed it about as high as I wanted the pocket to be. Not quite halfway up the hoop.
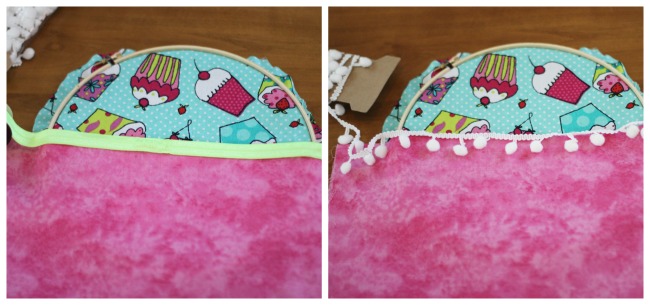
Next if you have some trim to add like ribbon or lace or tassels it just makes the hoop a little more fun. If you want something a bit more sophisticated a muslin or more neutral fabric would look great with a pretty ribbon. I decided to go with the little white tassel. You can either put the tassel on the pocket directly or glue it around the outer hoop too.
Almost done! Next you can either glue the semi circle at the bottom of your hoop where the two fabrics meet (obviously don’t glue the pocket shut) or just place the outer hoop right on top and that was very secure for me.
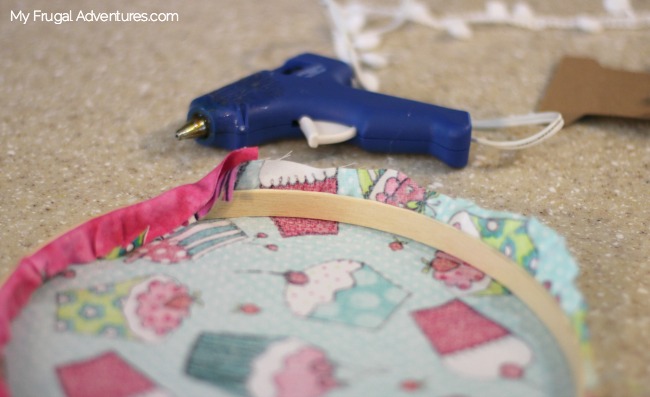
The last step is just finishing the edges by folding them over and hot gluing to the embroidery hoop. Again just trim the fabric if you have too much around the sides.
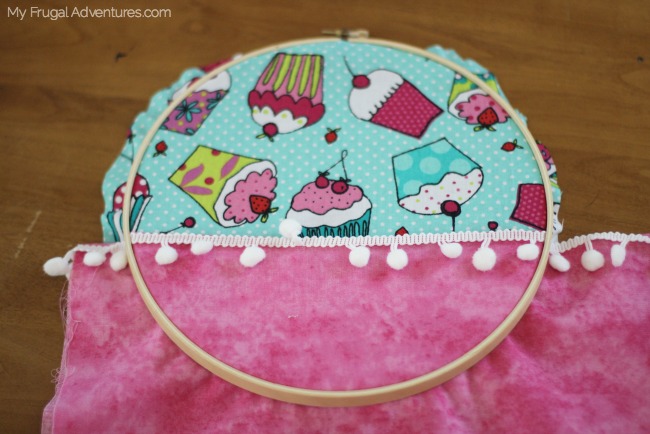
And you are done! Just be certain as you place the outer hoop on that the metal clasp at the top is centered.
And here it is in my daughter’s room:

I am thinking a grouping of three is going to look fantastic and add a lot of color to her room. If you decide to try this project, I’d love to see the design you come up with!
Here are a few other projects you might enjoy:
Leave a Reply