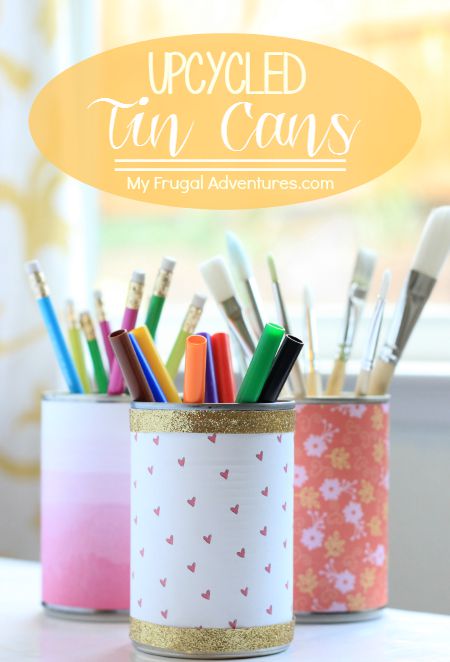

Here is another easy peasy project for Back to School. I have seen these paper covered tin cans in magazines before and thought – cute. And then I promptly forget about it.
I recently purchased a desk for my little girl (who is quickly turning into a big girl) and I was trying to think of simple and inexpensive ways to store her supplies.
I was thinking of making some mason jars or perhaps a little caddy but I really wanted something small that won’t take up too much space and clutter up the nice white desktop. I don’t want any distractions during study time because this particular child loves distractions of any sort.
So I remembered seeing these tin cans and decided it might be worth seeing how they work to hold a few things on her desk.
What I love about these cans is that you can literally open up something in your pantry and try this right now. You can spray paint the can and use different colors of paper for totally different looks. These are so pretty as a vase for a garden party or use them as we did to store any number of things. I can see using these to hold utensils for BBQs, holding art supplies and odds and ends in the closet, hair bows and such in a children’s bathroom or I actually have a few cans in the garage right now to corral screws and such.
So to get started you just need a few basic supplies:

Empty your can of the contents and rinse thoroughly. Be sure to save the label off your can.

Next take your scrapbook paper of choice and place pattern down. Use the label from the can to trace a rectangle on the backside of your paper.
Cut with scissors or a paper trimmer. The label from your can will create a perfect template for the paper.
Once the paper is cut, cover it completely with a light coat of mod podge. Make sure to pay special attention to the edges of the paper to prevent it from popping up on your can.
Place the paper directly under the lip of the can and carefully slide it around the entire can.
Push firmly on the edges and the seam to adhere the paper. Mod Podge will dry quickly so you will want to work fast.
I hold down the seam for about a minute just to ensure it is nice and secure.
You are done! So simple and so fast!
You can dress this up a bit with twine, ribbon, washi tape- anything else you like. I added a little glitter ribbon to the top and bottom of one of my cans by just adding a dab of glue to each end of the ribbon. If you prefer to use fabric and not paper, that works beautifully as well.
Here is the finished product:
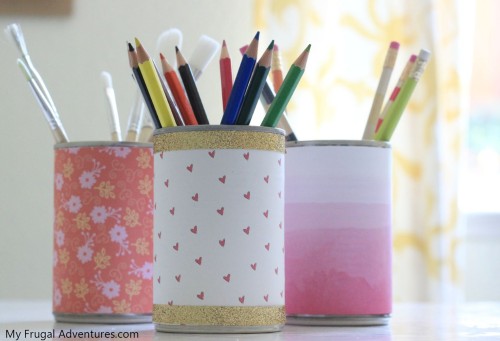
I have to say I love how these turned out. I picked up the scrapbook paper for $.20 on sale at the craft store and I made a batch of homemade crock pot marinara sauce to use up a few cans of tomatoes- so the price for all three of these cans was like $.60. Plus the sheet of scrapbook paper will easily make 3 cans per sheet. When you get tired of this, just rip the paper right off and use a fresh sheet in a different pattern or color.
If you decide to try making these, please come back and let me know how it goes! Oh and here is another look at how these can serve as vases. Super pretty in a group for a really inexpensive centerpiece!

And here are a few other projects you might like:
[…] myfrugaladventures.com […]