

Do you take pictures on your iPhone? Of course you do- if you are a Mom (or Dad) you probably have about a million of them. I have a DSLR camera but quite often I don’t have it with me or don’t want to bring it along and I just have my iPhone to capture special moments.
I am not a professional photographer by any stretch but one goal I have had for myself for 2016, is to take better photos and to take more photos of my kids. They are growing up so fast and I feel like childhood is just slipping away and I want to be able to go back one day and remember the tiny little fat feet, the chipped pink glitter nail polish, the first time they tried Shaved Ice in Hawaii…. Those little moments that are so special.
If you also want to capture those special moments and try to get the photos to look a little nicer- maybe even frame-worthy- here are a few tips to capturing good iPhone photos without a lot of fuss:
Set yourself up for success. This is the most basic thing but always wipe off the lens on the back of your phone. Any tiny smudge will take away the crispness and clarity of your photo. Hold the camera steady, gently push the button and hold steady until the camera completely finishes taking the photo. I try to keep my elbows next to my ribs or I try and steady myself. Elbows on the table is a trick I use often. The steadier the camera is, the less motion blur your photo will have.

Add grid lines to your camera screen. One of the rules of photography is the rule of thirds. The idea is that you don’t want your main subject centered in the screen, it is more interesting and appealing to have things aligned across these nine little boxes on your photo. In the image above (courtesy of wikipedia) the horizon is on the bottom third and the tree is perfectly lined up on the right side and the photo is just stunning. The photo would still be pretty not on the gridlines but I think there would have been something not quite right when you looked at it.
Your camera should automatically have the gridlines but if not, go to Settings, Photos & Camera, and then turn the little button next to Grid to green.
The trick is to actually pay attention to the grids when you take your photo and use them for a better composition. (I forget all the time and have to remind myself to look for it.)
Wait for the moment. This is really hard to do for parents. We go somewhere and say to the kids- smile! and then snap the photo and maybe don’t even look at the picture. Sometimes if you wait just a few minutes to get a more natural and candid photo it can be so worth the wait.

These photos were quick shots- probably 2 minutes in total. I took my girls to try shaved snow with popping bobas recently. We have never tried this before and I was so curious. The desserts were so gorgeous and fun and I wanted to snap some quick pictures. I snapped this one above really quick. It isn’t great. Shows the desserts, shows them, a little out of focus. Just a quick snap. But I decided to wait a second and then I got this:

Again this isn’t magazine worthy picture, I didn’t spend time planning the composition and angling the best light and all that. I just waited about 30 seconds so the kids forgot I had my camera and caught this sweet little smile from my little girl (and sneaky little fingers grabbing at sprinkles) that I love. And then they took the first bite:

It looks a little staged but this is reality. My big girl on the left is very suspicious of new things, decides she doesn’t like things quickly and I love the slightly unsure look on her face. My baby girl on the right is the one that doesn’t wade into the pool but rather races out and takes a giant belly flop. That was really her expression taking a bite.
Again these aren’t meant to show what an amazing photographer I am but just a suggestion that sometimes if you just wait one extra minute, you might get a photo that is so much better. I could have tried harder to make a really good photo here but honestly I wanted to be present with them and not fussing with the camera. Also you have to be quick with these kids or those plates would have been empty and I wouldn’t have gotten a bite of my own 😉 #priorities

Change Your Position. Again I usually see people yank a phone out, snap the photo and that is that. Sometimes if you slightly change your position, the photo can be so much better! For small kids, getting on their eye level can make a photo. I almost always crouch down when taking photos of my kids. This shot I took recently and just knelt down on the ground to be eye level with her.
The other advantage to crouching down (or getting higher if you can), you can clean up a cluttery background. If you are taking a picture at the park or at soccer or the roller skating rink or even at home, there is likely so much junk in the background- people, cars, equipment and so on- if you crouch down you can probably clean up and simplify your background. Here is an example of what I mean:

This was another Instagram shot from last fall when those gorgeous Starbucks cups came out. If I took the shot at eye level you would have seen the grass, the toys in the yard, the plants that needed pruning, the dog peeing… real life. That would be so distracting and takes away from the photo rather than adding to it. Instead I raised my hand in the air and snapped a shot with the camera angling upward to try and just get the tree and the blue sky as the background. I always try to look beyond the subject I am shooting (say the kids) and look behind them and see if I can get rid of as much of the background clutter as possible. You might have a super cute shot of them playing on the sidewalk but the neighbor scratching his bum at the mailbox can totally ruin the shot. The nicer DSLR cameras can be adjusted to blur the background- that is what makes a pretty photo instead of just a snapshot. If you don’t have the ability to adjust your camera settings, just changing your position can make a huge difference.
Sometimes a cluttery background adds to the photo- I love a snap of my little girl surrounded by a huge pile of books. I wouldn’t want to cut the stacks of books out of the photo because that is the story I want to tell with my photo.
This is a great trick at the park in particular. Try crouching on the ground and snapping photos up at the kids instead of standing normally.
Edit. You can edit photos really quickly with a bunch of different apps. I like a bunch of apps including:
- Pro HDR (great for landscape shots)
- VSCO (I use for all my Instagram photos)
- Hyperlapse (to take fun videos)
- Snapseed

You can also do a handful of edits directly on Facebook or Instagram. These aren’t as good as the apps above and I am always leary of using presets and filters in photos but here is a photo I snapped of my sweet girl making these beaded bookmarks– her concentration was so sweet to me but it was just before bed and I absolutely hate the yellow light you get at night. A more blueish tint is much more appealing to me personally and this takes seconds. Just upload your photo to Facebook, hover over the photo and you can see this edit button. They allow you to choose a filter with winter being cooler tones and summer being more reds and yellows and then publish as usual. Just that one second of taking the picture from the left to the cooler tone on the right I think makes a difference.
To show investing about 2 minutes in an app- this was a shot from Yosemite using my iphone:

The one on the left is pretty in full size on my computer screen but I wanted to pop something up on Instagram and brighter photos are always more appealing. So I used ProHDR and just brightened up the photo with a few clicks and it translates so much better on a tiny screen. I didn’t change any colors, I just took away shadows and added highlights and the pretty fall colors really pop.
*You can brighten the photo directly on your phone. (Directions on how to do this are here.) I have tried this many times and I find that the picture turns out so grainy I am sad. So I prefer to edit the photo to add brightness instead. Oh and you can zoom in on your phone too- I never do this. It makes the photos so blurry I wind up deleting them and saying bad words. Better to move closer if you possibly can.
Set the focus. When you have your shot (say the flower display at the market) gently tap the screen and you will see the camera auto adjusts the focus. That is great to be sure your subject doesn’t get blurred as you take the picture.
Go for the candid shots. iPhone photos of kids especially are always camera aware. The kids looking straight at the camera with a real or forced smile. The smiley faces are cute but not for every photo. I try really hard to catch the little quirky things that speak to the moment. An example is at the beach, I love the shots of the kids running in and out of the water or digging in the sand for seashells or those chubby fingers holding onto a bucket, not the ones where the kids are standing there smiling at me. The beauty of having small kids is that honestly they could care less what they look like and if you are snapping photos of them. They live in the moment and I love capturing that.
Here is a super recent one where we went on a picnic right smack in front of the cutest little restaurant:

Here is an example of (I think) not cleaning my lens and so it is smudgy but this is what a picnic looks like for us at this stage. I was enjoying the sunshine and didn’t want to move around so this could be better by adjusting my position but again iPhone pictures are meant to capture a moment in time- not to always be perfect. I would much rather have this shot than one of the kids smiling at the camera and sitting nicely on the blanket.
I have a friend that is amazing at catching these little moments. She gets the kids yanking the Tupperware out of the drawer and tossing it on the floor, on tippy toes on top of a table reaching for something from the bookcase, a choke hold for baby sister instead of a gentle hug, the finger in the nose on Santa’s lap or most recently tiny little buns peeking out from a little person that felt pants were overrated.
The moments she captures are really authentic and really make you feel like you know these kids and their personalities. Not just the smiling happy faces at gymnastics and on the playground but the real essence of who they are as people. (I am so jealous of her natural gift at this and I know they are all iPhone photos.)
So those are just a few little tricks I have learned to take better iPhone photos. I am still learning all the time and really the best way to learn is to just take photo after photo after photo and then really look at them. I have zillions on my phone and when I have a free second- in line at the store or something- I just go through and delete, delete, delete, delete.
I would LOVE to hear your tips for improving photography- especially when using an iPhone.
Here are a few other articles you might also enjoy:

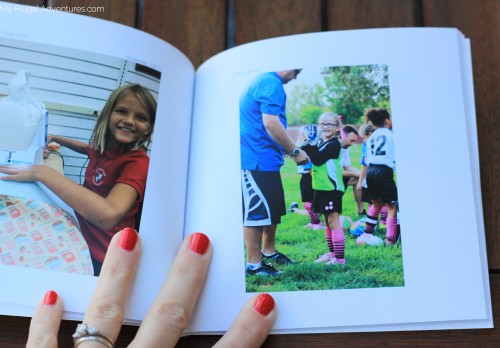
And if you not only want to capture those moments with the kids- but actually get them off your phone and into a cute little photobook- here is an easy way to transfer iPhone pics and social media pics into photo books. (the first one is free!)
Leave a Reply