I have a fun project for you today that is so simple (and I think) really adorable. This would be a perfect summer craft with the kids or make these as gifts for Mom, Dad or the Grandparents. I think they are really adorable and such a cute little keepsake.
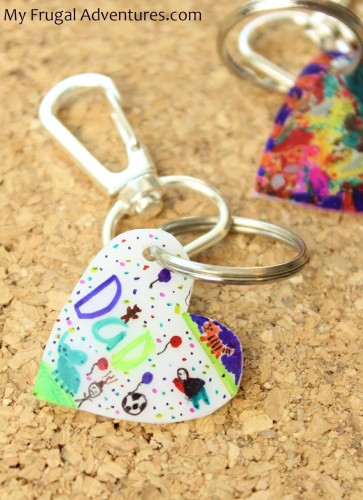
We wanted to make these for Dad and they turned out so cute, my girls are going to make one for Grandpa this year for Father’s Day.
You can easily put the kids to work labeling all the keys in the house with these- mailbox, spare key etc… or these keychains would also be very cute for them to make for their friends as a little tag to hang off a backpack zipper. I can already see my little girl drawing out BFF with rainbows and such for her friends.
Buy necklace chains instead of keychain hardware and these would be adorable little necklaces or charms for bracelets.

Heart Hole Punch or Mason Jar, Cookie Cutter, glass etc.. for a larger shape* (please see notes below about sizing)
Shrinky Dink paper
Sharpie Fine Point or Extra Fine Point markers
Keychain clips

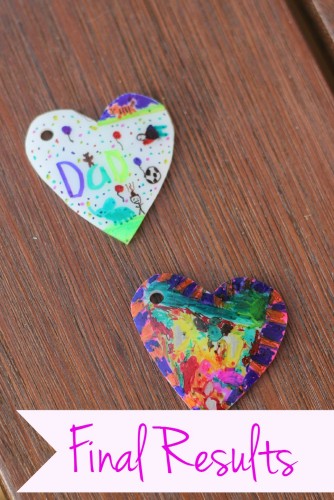
To start with you need to determine what size you want your keychain and what shape. My girls really wanted a heart shape and we first tried this by using my heart shaped punch which is about a 2 inch punched piece. I simply punched out Shrinky Dink paper into the heart shape. What we discovered once the project was done is that the heart punch creates a very small heart- I felt it was too small for a keychain. The size would be perfect for a necklace or bracelet but it was a little small for a keychain.
So next I found a heart shaped cookie cutter in the drawer that is about 3 inches and used that to trace a heart on the Shrinky Dink paper. Once I traced it, I simply cut out the heart and boom. We were off to the races. You can use anything you might have to create the correct shape- cookie cutters, small glasses, mason jar, anything to trace a nice circle or star or heart or whatever shape you want. If all else fails you can always print a shape from the internet on a plain sheet of paper and trace onto the Shrinky Dink paper and cut. The Shrinky Dink will reduce to more than half the shape so don’t go too big or you might have a giant keychain.

The next step is super important- once you have your blank piece of Shrinky Dink paper use a standard hole punch to punch a hole for the keychain. If you forget this step the Shrinky Dink will be too hard later so don’t forget. (Ahem… not that I speak from experience on this one…)
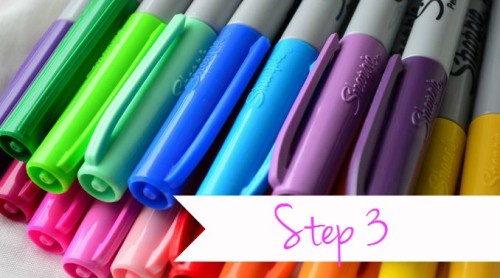
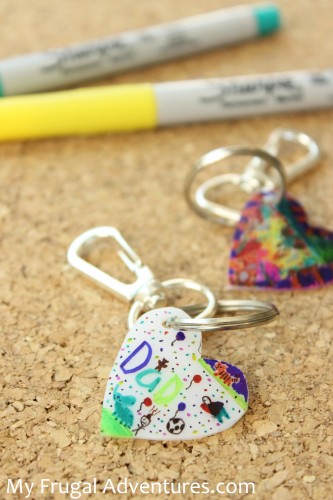
Now the kids are off and running to color as they like. I have found Sharpie markers with a fine point are the best to use. The colors will be vibrant once the paper shrinks and it won’t fade off. If you choose to use something else- like washable markers- please note they may fade or discolor in the oven. Sharpies are the best bet. We used a mixture of fine point and ultra fine point- the ultra fine point are a little easier for detail coloring because the heart was so small but you can use whatever you have.
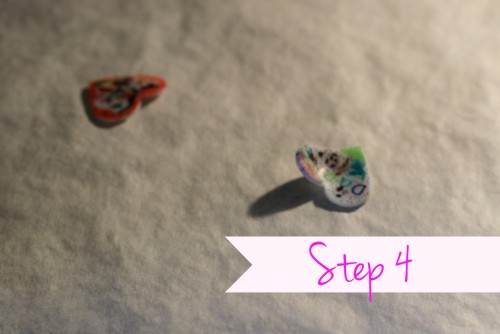
Once the masterpiece is finished, you want to bake according to the directions on your Shrinky Dink paper. Mine was 300-350 degrees for 2-3 minutes. I lined a cookie tray with parchment paper to bake and set the oven to 325. I found ours took closer to 7 minutes in the oven. The most important thing is that you watch very carefully. You want to take them out right as they are done baking so I literally stood in the kitchen watching them bake. I found that my Shrinky Dinks shrink to the right shape and then sort of bend in an odd angle and then they seem the flatten out- so don’t panic if yours start to curve in- just let them continue to bake until they are flat and immediately remove from oven. I pulled the parchment off the hot cookie sheet right away as well.
If they are still not flat, working very quickly while the Shrinky Dink is still warm, you can add a square of parchment paper on top of your shape and then place a heavy book on top to help it flatten out a bit more.
You should have a nicely hardened Shrinky Dink with a hole that you can slip a keychain into. So simple and so cute!
As mentioned the Sharpies actually get brighter when they bake so the colors look fantastic.
And what do you think? I think Grandpa and Dad are going to love these!
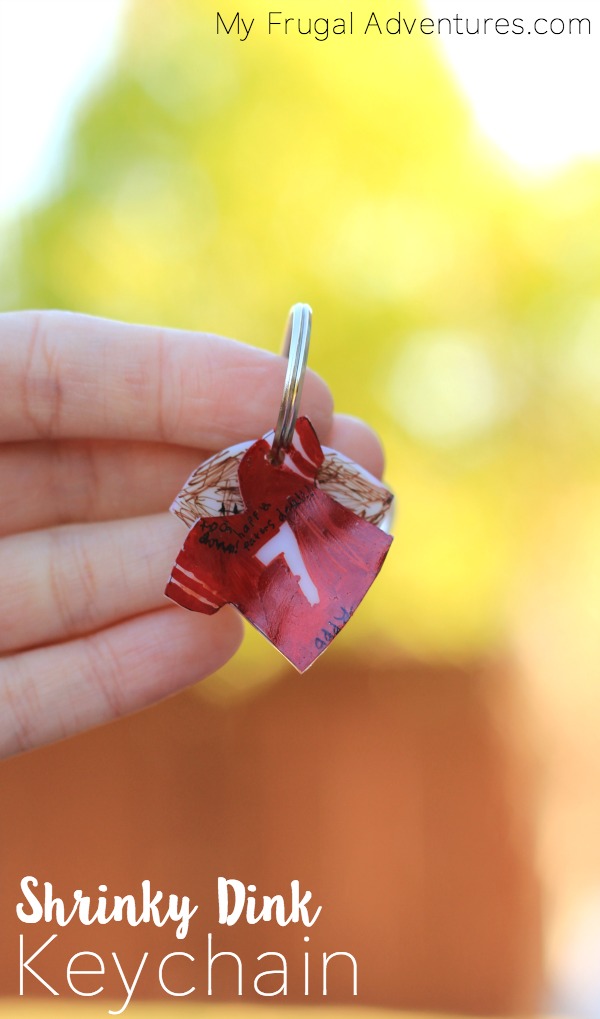
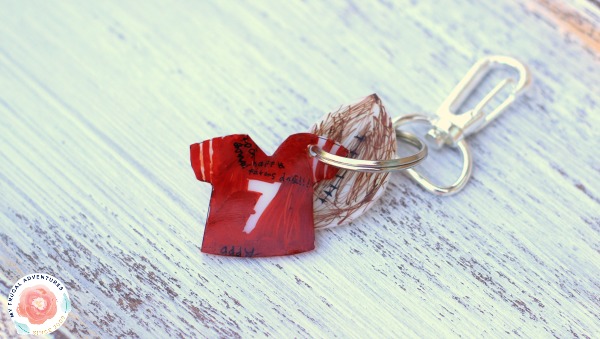
And here is one for Grandpa (he is a 49ers fan):
If you like these crafts, you might also like:
Very cute! I’ve never heard of shrinky dink paper but I will check it out. Lots of details in the kids’ artwork!
It is really fun Rachel and not that expensive. Your kids will love it 😉 Shrinky Dinks were popular when I was little- kind of a vintage craft.
Do you think you cut a shape with the silhouette machine? I just got one but haven’t used it much. My daughters teacher loves frogs so I thought it would be a cute end of the gift.
Heather- I don’t know if the Shrinky Dink paper would work with a Silhouette but you can cut scrap paper and trace the shape of a frog onto the shrinky dink paper and cut that for sure…