
Here is another fun and pretty easy little children’s craft project.
This is a very inexpensive craft and I think the results are both pretty and functional.
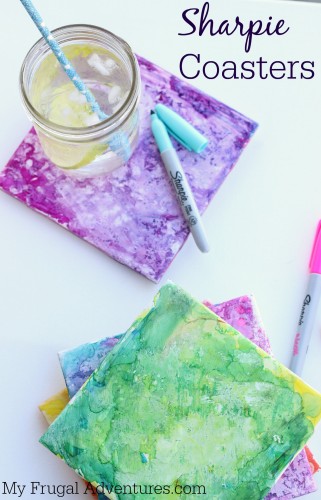
You can use Sharpies to create beautiful designs on coasters or trivets in whatever color scheme you like.
This is one of those easy rainy day projects to file away as a possible gift idea for the Grandparents!
To get started you want to pick up some tiles from your local home improvement store. You can choose small tiles (4×4) to use as coasters or slightly larger tiles (6×6) which make lovely trivets. I would get the shiny tiles- ours were about $.50 each.
Here are the other supplies:
- Assorted Sharpies in the colors of your choice
- Rubbing Alcohol
- Eye dropper
This craft was originally posted on the Sharpie blog so I followed the instructions they offered. I will tell you that our results were not the same as the Sharpie blog and some of the instructions weren’t 100% clear to me. I think think these turned out really cute though so I am not at all disappointed in the project. And really the kids absolutely loved this project and my husband said “Hey those look really cool!” so a win all the way around.
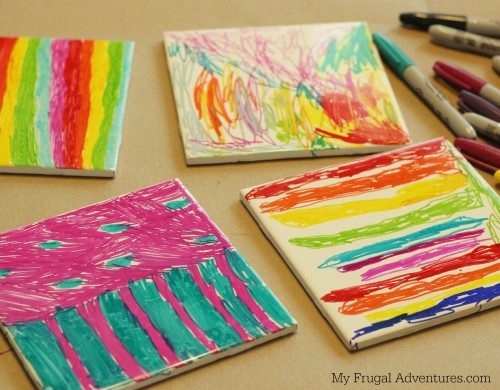
To start with let the kiddos loose with Sharpies on the tiles. Do not worry at all about mistakes- we found the Sharpie came off really easily with water so you can just wash away any mistakes and start fresh. We used the standard Sharpies you can see below- not fine point markers.
Initially we tried for lots of pretty colors- this was our first set of tiles:
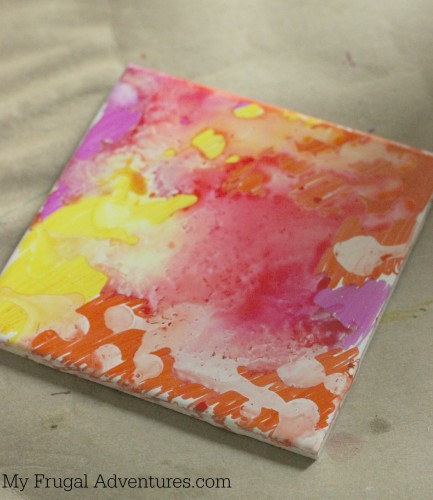
So we were really excited about the rainbow coaster on the top left in particular- once we started adding the rubbing alcohol it looked awesome:
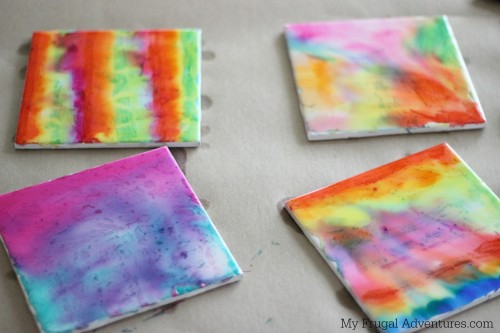
We thought these looked pretty cool but once they dried they looked terrible. All the blended colors looked grey and swampy and we would up washing all of them except one to start fresh.
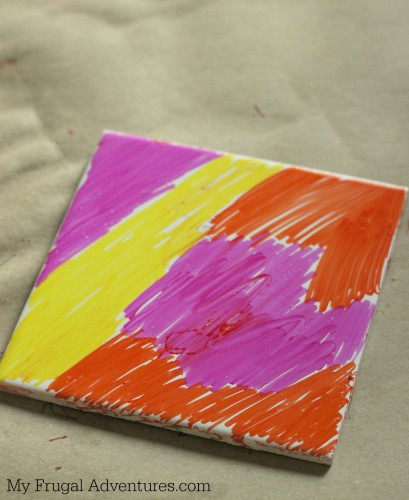
So you might consider sticking with 2-3 colors at most and use colors that will blend together nicely such as yellow and red. (Your colors might wind up either brown or grey otherwise.)
Note my 5 year old left a lot of white and made very thin little designs on her coasters and my 7 year old made thicker designs and colored the coasters in completely. Both strategies worked fine in creating little masterpieces.
Here was another one that we did just so you can see you don’t need any special pattern to your design. Just have fun and color it in however you like.
Once you are done coloring the tiles you can either let them dry or you can just move on to step 2 right away. Step 2 is to fill an eye dropper with rubbing alcohol. If you don’t have one, you can try using a spritzer bottle or a straw to slowly drop dots of alcohol on the coaster. It will spread and create cool patterns on your tile.
Here is what ours looked like:
What we found is that it is best to only drizzle on a little of the rubbing alcohol and let it spread. Then once that dries a bit, you can come back and do a little more… and so on until you get the design you like. You can add a little more Sharpie once it dries if you find too much got washed away from the alcohol.
Once it is dry you might take a look at the edges of the tile and see if you want to color those or leave them alone. I colored some of them and left some of them alone just depending on the tile and the colors we used.
When you are happy with your design, you can take a spray fixative and lightly spray over to seal in the colors. I wasn’t sure what Sharpie meant by “fixative” so at first I used a spray glue I had on hand. Mistake. That gave the tile a texture that I didn’t like at all so I wouldn’t recommend that.
I combed the aisles of the craft stores to find “spray fixative” and came up empty handed. I finally settled on a spray Mod Podge that was $5.99 with a coupon at Hobby Lobby ($9.99 regular price). Oh and I also tried to use the regular Mod Podge I had on hand to just brush it on. That didn’t work either as it smeared the Sharpie into lines and ruined the design. So the spray Mod Podge might be the best road to take.
Go ahead and spray that on and let it dry. Last but not least you can add a varnish at this point and add felt to the bottom. I did not varnish our tiles and mine have held up fine. If this is a gift for someone or you think you might be washing this frequently, it might be worth the extra step to find a varnish to really protect the color. I tried setting a drink on our unvarnished tile that was icy cold and sweating water onto the tile and I found the colors did not smear off- so success with just the Mod Podge for me!
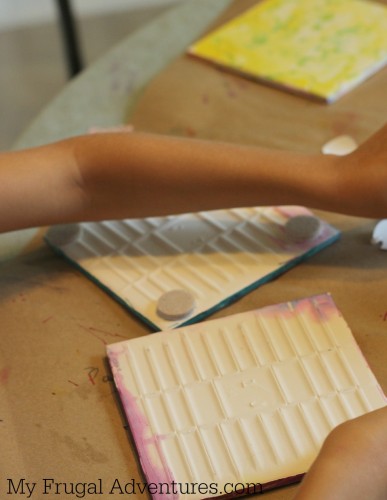
The tile bottom is textured and will easily scratch up a table so you can get simple pieces of felt and cut to the size of your tile and glue that on the bottom. For a more finished look, you can actually buy little felt circles that will stick to the bottom of the coaster to protect surfaces. I found these with the ironing and curtain supplies at Joann’s for something like $2.00.
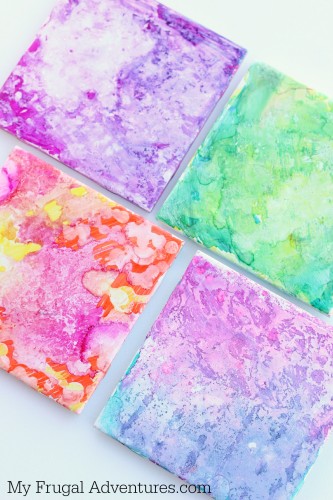
And your finished tiles should look pretty cool:

I have one of these on my desk with a candle on top and my little girl has one on her craft table with a jar of markers on top. The other two are in the kitchen to use as trivets.
So give these a whirl and see what you think! The price for everything was about $.50 per tile, about $3 for rubbing alcohol, $6 for Mod Podge and $2 for the felt pieces.
And here are a few other projects you might like:
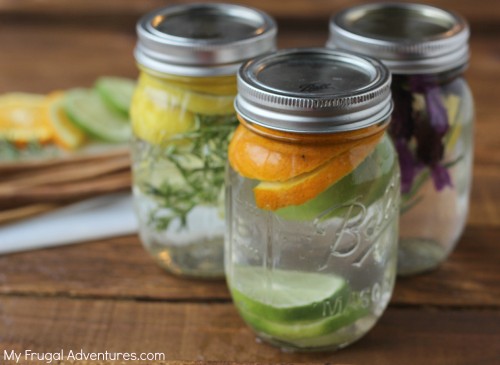
DIY Home Fragrance (like a Williams Sonoma store!)

Colored Sand Art (made with salt and chalk!)
I think hairspray would have worked as fixative as well. They do look really cool!
Such cool coasters – and a really fun craft to do with the kids!
Thanks for linking to a Round Tuit!
Hope you have a fabulous week!
Jill @ Creating my way to Success
http://www.jembellish.blogspot.com/
I’ve seen this on Pinterest and have always wanted to try it. Thanks for testing out the instructions and working out the kinks. Would lovd if you came and shared this on the Merry Monday link party.
These are so cool! I love the tye-dye effect. Every holiday season, my kids pick out gifts to make for their aunts and uncles. Will pin this one!
Just added to my must try project folder lovely idea!!!
What a lovely simple activity for the grandkids when they come around.
Diana
Thanks for coming and linking up at #The Weekend Social. Please be sure to come back next week starting Thursdays at 9PM EST on KitchenDreaming.com ! I hope to see you there!
Thanks for sharing your coaster project at The Wednesday Roundup! We’ve chosen it as a feature for this week, congratulations!!!
Congrats on being featured this week on The Wednesday Roundup Link Party! We love having you join us! This post has also been pinned to our link party features board: http://www.pinterest.com/anglemoine/the-wednesday-roundup-features/ ~Angela @ LeMoine Family Kitchen
I went to the website you quoted was your source. However, they in turn, quoted another source: http://thecraftedlife.com/guest-post-alcohol-ink-dyed-coasters. This site uses a different medium (alcohol dye) so maybe that is why some are having problems. I hope this helps 🙂
Hi Becky- I did not reference that site because they used the medium you mentioned. On this blog I try to just do things that are simple and don’t require a lot of fuss or special ingredients. The Sharpies seem to be something more easily accessible. To buy the alcohol ink was about $10 for 3 colors and you might need to purchase a few packs to get the colors you want and that seemed a little expensive to me for a simple DIY craft. I also wanted something that children can do and I would definitely not give my kids the alcohol ink. So you are absolutely right there are two great options available- I just chose to do the kid friendly and inexpensive option. If you want to do a really nice gift for someone or the coasters are a centerpiece in a room, the alcohol is probably a better choice for more vibrant colors 🙂
Are your tiles finished and smooth on the top before you sharpie? i’m having a hard time making these!
Alex mine were smooth because the rough surface is probably pretty porous.
I was on another website for these and in the comments these two fixatives were recommended.
VHT SP 145 engine enamel. this is found at auto parts stores, Auto Zone was mentioned. This has to be heated to cure, but i guess it makes them really durable.
Rustoleum painters touch ultra cover clear gloss is also recommended.
Mine didn’t Turn out like yours, how did you get the all over Soft tye dye look.
Hi Ydelle- can you explain a little more? I think you are saying you have a lot of line marks on your coasters? To blur really well you need to be generous with the rubbing alcohol and maybe don’t let the marker dry very long. HTH!
Is there a way to send you a picture of how ours turned out
Sure you can email myfrugaladventures at yahoo.com. 🙂
The pictures are in the way
Where should I buy them?
Do you have to use Sharpies or will any permanent markers work the same? The issue is price, especially when using them for a kids’ project. 5 Sharpies for $5 bucks or 8 generics for $2. I’m wondering if the effect might even be better since they might not have the “staying power” of *real* Sharpies. Has anyone tried it with generic markers or even the regular /washable markers?
Nola, I haven’t tried off brand markers for this project so I am not sure. I see sales on Sharpies at Walgreens every few weeks- $.69 each. I haven’t had great experiences with off brand crayons and markers for school supplies so I am not sure how well it would turn out.
So your tiles were smooth as in glossy?