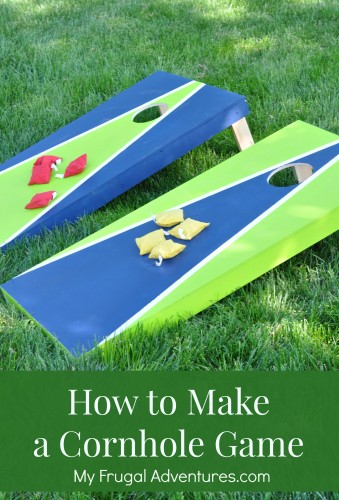
Have you ever made a corn hole game? It is a pretty simple project and now is the perfect time with summer coming. These games can be fairly expensive to buy- I see them regularly for about $75- $100. You can make one though for much less and in just a few hours. This is a fun project for Dad to do with the little ones and I believe we spent about $40-50 in total in supplies to make our game.
Then just paint it in your favorite colors/theme and you have a sturdy game for parties, tailgating or even to make as a gift.
I think Corn Hole might be a regional thing because I had never seen the game until I went to visit friends in lovely Omaha, Nebraska one year during the College World Series. We were tailgating and it seemed like every car had a Corn Hole Game to play.
So we came home and made our own game and now several years later we still drag it out every summer. In fact, we just got it out for my little girl’s birthday party recently. It was a fun game for the little siblings to play during the party and also something for the parents to do while the kids play.
To make the game is very simple- ours is actually semi-collapsible so it tucks away nicely in the garage. You can also mount hooks to the wall and then just store the game that way if garage space is at a premium.
Here is what you need to make each board- you need 2 boards in total.
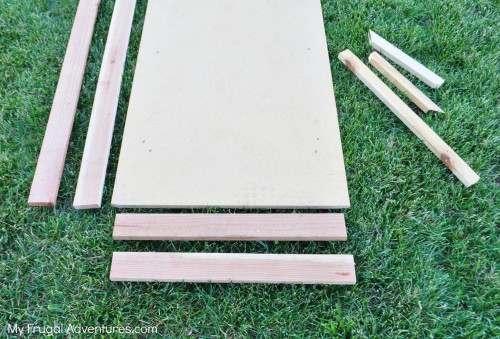
You want to head over to your favorite home improvement store and get the following pieces- you can cut these at home yourself or have them cut them for you:
- ½-inch plywood or MDF- 24×48 inches (2 pieces)
- (4) 1×3 pine cut to 48 inches each
- (4) 1×3 pine cut to 22 inches each
- Legs- (4) 1×3 pine cut to 12 inches
- Center piece for extra durability- 1×3 cut to 22 inches
You want to try and find wood that is going to have a nice smooth surface so the bags don’t stick to it. You can either get a nice veneer birch or check the MDF in your store for something a little more budget friendly.
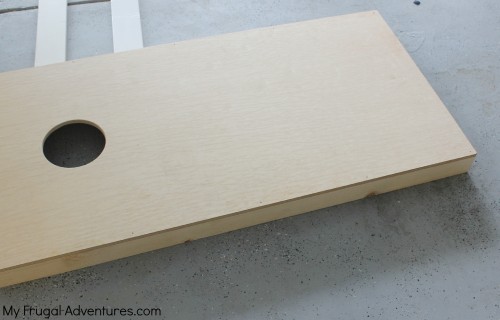
The first step is to take your piece of plywood and cut the hole into the top. This is where you toss the bean bags. For your boards to be regulation – oh yes my friend there are regulations and an actual American Cornhole Association 😉 – you want the hole to be 6 inches and centered at 8 3/4 inches from the top of the board.
We put our hole at 9 inches from the top- if you don’t need to have an exact regulation board this is an easier measurement.
We used a 6 inch wood bit to cut the circle on a cordless drill. (Ok that is a lie- we attempted to use what we had which is a jigsaw to cut the circle. Our circle was not perfect and looked a little lopsided so I packed everything off and headed to my Dad’s house where he has the fancy wood bit and helped to make this perfect circle ;). Yeah for Dad!
To get the perfect 6 inches you can either go old school and use a compass to draw it on your board or you might have something around the house like a pot that is the right size to draw your circle.
Once you have your circle cut out you want to get started on the easy frame.
Simply attach the 1×3 pieces together to form a box. Next lay the board on top of the frame and use wood glue to adhere the top to the frame.
We added an extra support piece in the center of the board as you can see above. You can use a nail gun or deck screws to attach your boards to the frame. We used a nail gun and I think our game is pretty darn sturdy.
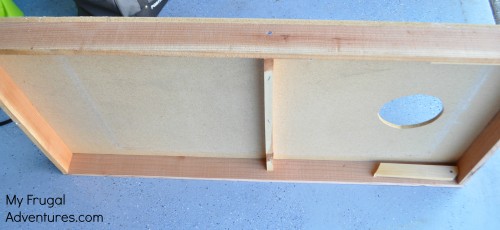
Once that is done you want to attach your legs so that the board will prop up a little higher at the top. There are lots of ways to attach the legs but we wanted legs that would fold in for easy storage. This makes it easier to transport too if you plan to take this to games or parties.
So in order to get the legs to fold in- like the picture above- you need the top portion of the legs to be a curved shape.
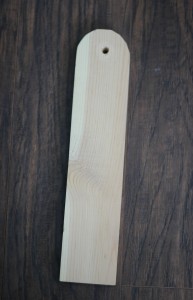
We just trimmed the corners with a miter saw into a semi circle and used sandpaper to smooth down the rough edges. It doesn’t need to be perfect but if you don’t shape the legs they won’t fold into your box and that makes storage and transport a little tricky.
Attach the legs on the inside of the box with a nut and bolt. We used a 3/8″ nut and bolt.
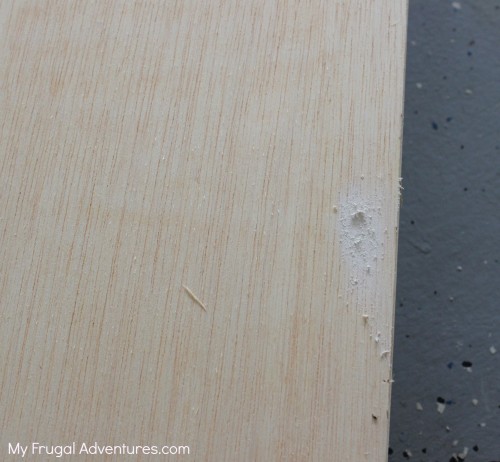
Once you have your nails or your screws in place just sand lightly and dab on some wood filler for a nice smooth finish.
Now you can choose how to decorate your Cornhole Board. You can paint it, stain it, add team logos or quotes or chalkboard paint or anything you like really.
I have seen Monograms for weddings or themed boards for parties- like a Sunshine for a beach themed party.
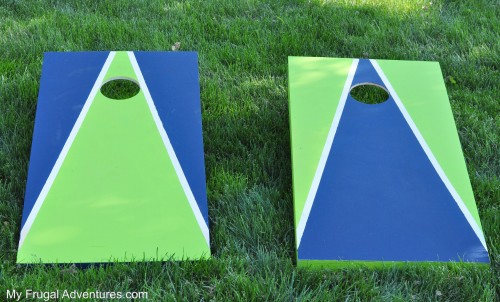
We decided to go with simple blue and green on our board for the Seattle Seahawks. CVS beauty event is a regular and major content of all CVS ads lately. At some point I might add a Seahawks logo or maybe a big 12 or something as well but for now we just painted the boards.
After adding the wood filler, I primed the boards with paint- I just used what we had on hand you can use regular primer or even spray paint primer.
Next we painted the boards. My husband just used painter’s tape to make a fun stripe on the boards. Make sure to use a credit card or putty knife to get the tape very firmly in place so your paint doesn’t bleed through.
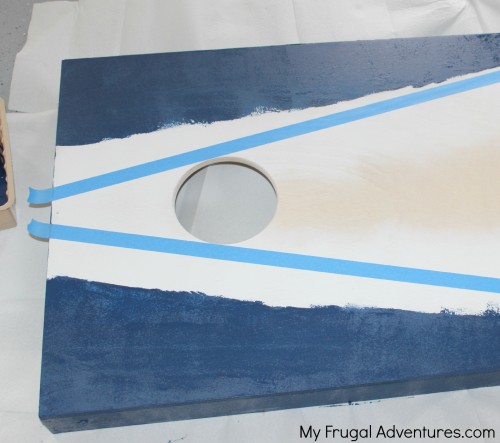
We picked up two small paint samples at Lowe’s and used those for the blue and green for our board.
Last but not least- to jazz up your board with a logo or image or something you can either print out a crisp copy yourself (or at Staples have them print it – just search Seahawks Logo or whatever you like on Google)- or you can buy the team stickers for just a few dollars from Amazon or your team store or you can use a Cricut or Silhouette machine to cut a vinyl adhesive sticker. I’d probably Mod Podge to make it very secure on the board.
We reversed the colors for the opposite board- here is what the final product looks like:
And the view from the side:
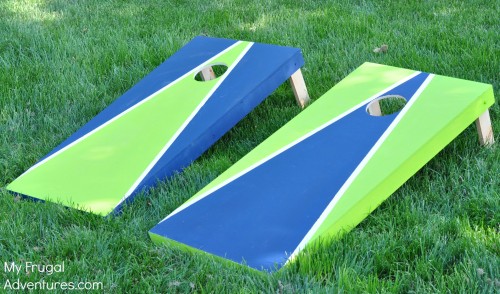
Almost ready to rock now. You just need to score some bean bags to go with your boards. This is where my DIY ability ends. If you have a sewing machine and are so inclined, you can make bean bags yourself. This allows for exactly the pattern and colors you like and you can follow the instructions here to make your own beanbags.
Once I priced out the supplies I decided it wasn’t worth it to make my own and I just ordered some bean bags from Amazon.
See? Easy peasy!
And our measurements were slightly different but I found a really good tutorial from the DIY Network if you need additional assistance in building your game. They have several extra photos that might be helpful.
And here are a few other things that might interest you:
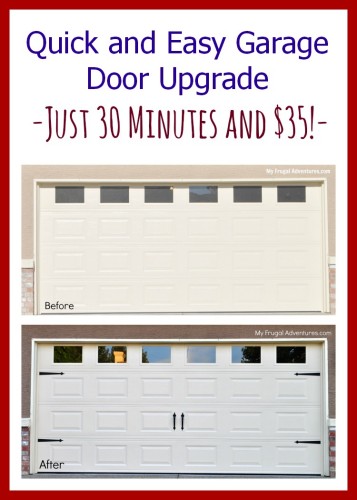
Super easy garage door update- just a few minutes and $35 (or less!)
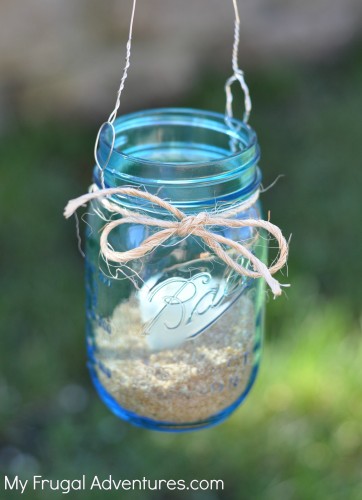
And these super easy hanging mason jar lanterns. So pretty to light a walkway or add flowers and candles to decorate your patio.
And if you want to fancy up your standard cooler- here is a really fast and easy DIY project.

love this. i wanted to get outside and “play” so i found a 3 in one lawn game thing for 18 bucks on clearance online. even if it isn’t the best, i knew that was an amazing deal b/c you are right, they are pretty pricey. this is a nice idea, too.
Looks easy enough to do, even for someone like me! I love that you can style it to any party theme! Creative idea.
Thank you for linking up to Party Time and we hope to see you again next week! 🙂
great tute! love the colors you choose too!
Your game looks like fun and easy to make! I love for you to link it up and share with my readers! Thanks! http://partypatisserie.com/2014/07/party-time-linky/
This is perfect! We’re in the process of remodeling out backyard and I have thought about buying these …. now I can have my husband make them! Thanks so much for shairng at Freedom Fridays – pinned and scheduled to share on Facebook! 🙂
This is so awesome. I love this game! But the pre-made are so expensive. We always say it would be cheaper to make it ourselves! I pinned this, so hopefully this can be a project soon! Thanks for linking up at the Pin It Party!
This is a great tutorial – About how long would you say it took you and how much was the total price?
Well, juat started building it…
I has the nice guy and home depot cut all the pieces exact to what the directions say. It had been a long day or I would have realized that 1x3s aren’t really 1×3 so to make the end boards at 22 inches doesn’t work. They are all too short.
Hi Ashley-
I am sorry but I don’t understand. Are you saying our measurements are incorrect or the Home Depot employee that cut your wood did not cut it properly? I am trying to find a mistake in my post and not seeing anything wrong at the moment.
A bit late to the reply, but what Ashley means is the shorter cross pieces that you call out as 22″ actually need to be 22-1/2″ long. 1×3 boards are not truly 1″ x 3″ in dimension. They are more like 3/4″ x 2-1/2″. Standard lumber that you’d find at Home Depot or Lowes will be this way. so a 2×4 is actually 1.5″ x 3.5″.
Hope that helps!