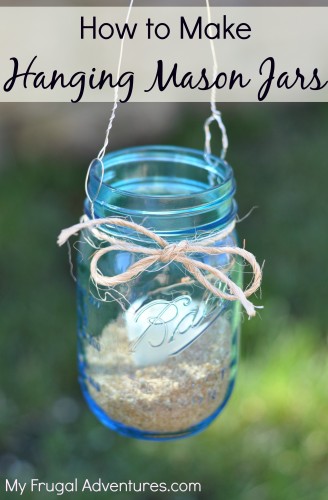

Have you seen these lovely hanging Mason Jars for flowers or for tea lights?
Well they are so pretty and such a great, inexpensive option to jazz up your outdoor space. These can be a little on the expensive side to purchase so here is a very quick and easy tutorial to make them yourself. You won’t believe how easy they are to make!
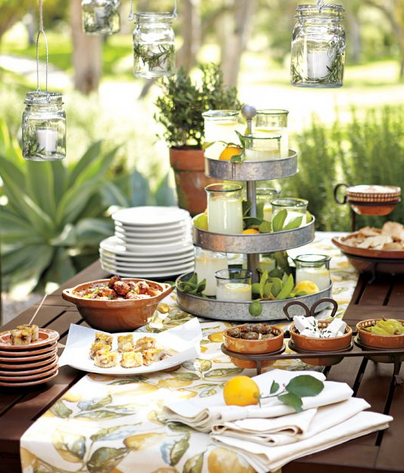
These are the ones you can pick up at Pottery Barn right now for $9.50 each. They are lovely but if you want to make several— well that is going to add up.
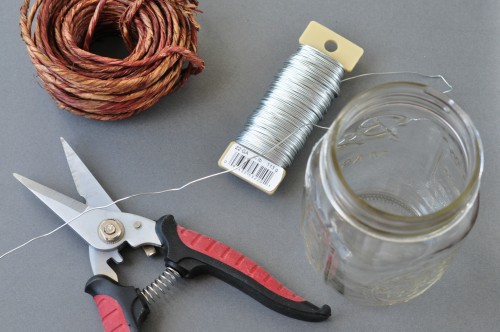
First you need to assemble your materials:
- Floral Wire– this might also be picture hanging wire. I found this large spool for $1.99 in the floral department at Joann’s Crafts.
- Mason Jars or Jars of your choice. I used the lovely blue Ball Jars but any jar will work.
- Pliers
Depending on the look you want, there are different types of floral wire. See the pretty dark brown twiney looking wire? That works as well for a different look.
I will warn you up front this will sound complicated but I swear it is so easy to do.
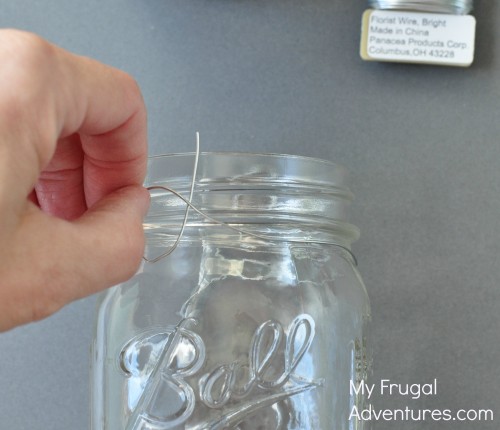
To start with you want to trim the wire- I wrapped the wire around the mouth of my jar 3 times and then cut. You need to decide how long you want that top part to hang though- mine is roughly 4 inches. If you want more wire to hang the jars cut your wire more generously.
Next you want to have a small loop on either side of your jar. So take one end of the wire and wrap it around your finger to create a little loop.
The size of the loop doesn’t matter. I think it looks a little nicer the smaller you can make it. Now twist the ends to secure the loop.
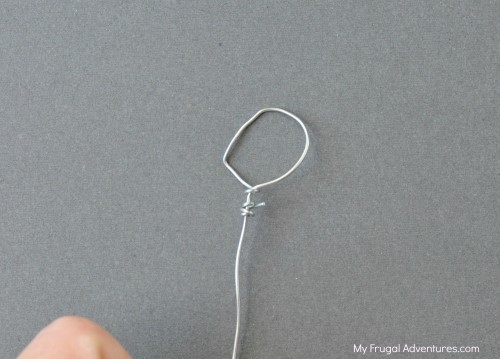
Next take your fingers and put the loop up against the lip of the jar and hold it into place. Curl the other end of the wire around in a semi circle and hold in place with your thumb.
Where your thumb is will be your guide for where the second loop needs to go. So take that long end of the wire and create a little loop and then twist it a few times so it is secure. Like this:
(Why yes I did take these photos one handed by myself… why do you ask? LOL- whoopsie. You get the gist. Two loops.)
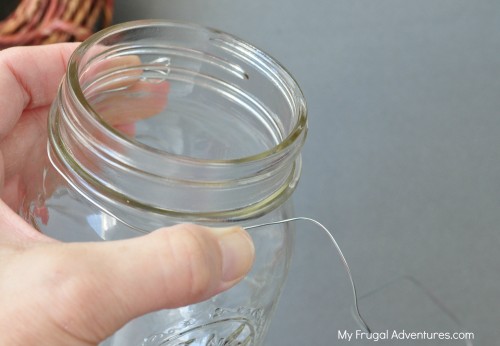
Now you want to put that first loop that has no wire hanging off (pictured above on the right) and hold it onto your jar. Take the second loop you created where the wire is hanging off and wrap it around tightly in a semi circle around the bottom ring of the lip of your jar. (Just like in the photo above where you see my thumb.)
Take the hanging end of the wire and pull it all the way around the jar under the bottom ring of the lip of your jar and pull it through the first loop you made. Like this:
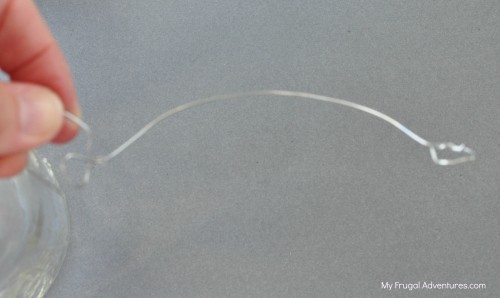
So now you have one end of the wire pulled through the loop and you want to try and pull it taut. Don’t worry if you can’t get it super tight we will fix that in a minute.
You should have a loop completely around the jar and then the end of the wire in your hand. Now that end is going to make the handle for this guy.
Take the end of the wire in an arch and put it through the opposite loop and twist to secure. If you feel like you have too much wire, snip it first to the size you like.
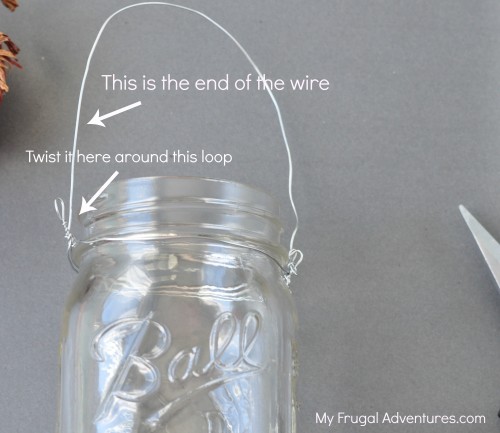
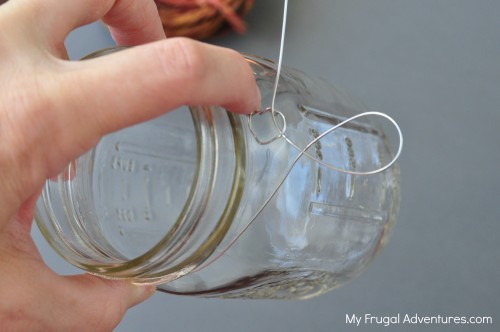
Ok now for the last step. You need that wire to be very tight so it won’t slip off the jar once there is weight in it.
Take the little loops you have on either side and twist them to make the wire as tight as you can get it.
Done!!
Now you can fill it up with candles, flowers…whatever you like.
The first one took me a few minutes to make and once I did that first one I was able to do several more really quickly.
And as I mentioned these are very cheap– about $1.00 for your jar and then the initial $2 investment in the wire and you can make tons of these. If I make any more of these in the future I think I will try to get a thicker floral wire. What I purchased works fine but I think a thicker wire might look a little nicer.
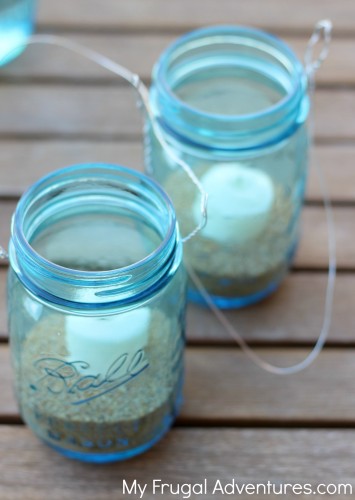
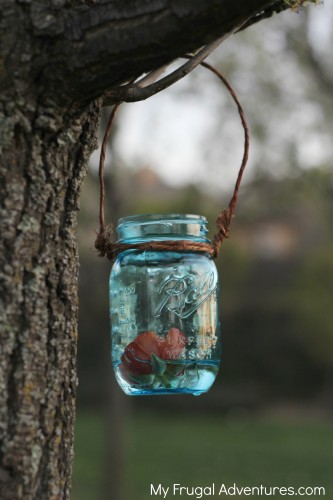
So I used clear glass for the tutorial but for the ones I did in my yard, I used these pretty blue Ball jars. I added a little sand (from craft stores or the Dollar Store) and a little votive candle and some twine. Done!
These are going to be great to hold citronella candles in the summer and they are very fresh looking with flowers.
We are in the process of building a pergola for the backyard and once that is done, I plan to add a few small hooks then I can just hook these guys on for a little twinkle at night.
Oh and here is how they look with just a little floating flower and the twine-y wire I mentioned.
What do you think? If you decide to try these out please come back and let me know how they work out for you!
what pretty ideas you have for these simple everyday jars. !!!!!
This was super helpful! I was trying to figure out the best method to do this on my own, and stumbled across your page. Thanks for the step-by-step! These are so easy and are going to be great for my upcoming wedding.
If you need many jars, they have them at goodwill for 99 cents…..
Got 12 mason jars at Old Time Pottery for 6.97! Great sales, you have to check them out 😉
Can you use actual flame candles or do you have to use the little fake LED candles?
Thank you,
Addie 🙂
Hi Addie- flame candles as long as you are safe with them 🙂
Great! Thank you!!