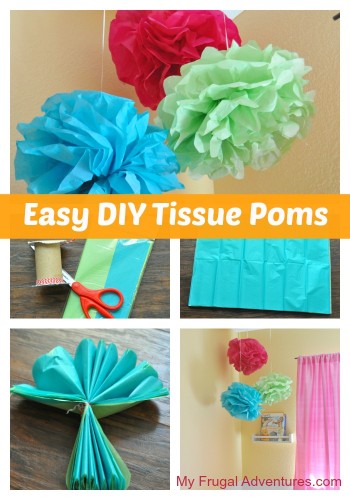
So for my little girl’s Mermaid birthday party I mentioned I had made these fun little tissue paper Poms. I thought I would post the instructions for how to make them because they are fun and super cheap and a great way to decorate with a lot of impact for little money.
They are really fun in children’s rooms and playrooms too and best of all this takes about 10 minutes and you can make each one for less then $1.00! (What?!)
How cute would these be hanging from tree branches for a summer BBQ?
If you are not a crafter do not get scared of this project. These turned out perfectly the first time I tried to make them (100 years ago) and I am by no stretch a super craft lady. Martha Stewart would be horrified at the mess I can make of many “simple” projects.
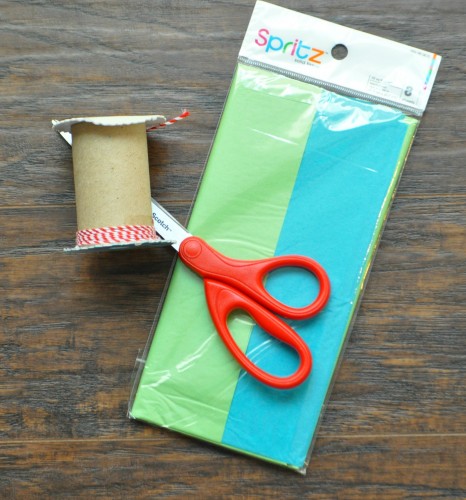
So to start out grab yourself some tissue paper, a pair of scissors and some sort of something to tie. You can use twine, curling ribbon, string or if you want to get super fancy a florist wire. (Floss would even work in a real pinch.) Just make sure to use something that won’t snap when you pull it into a tight knot.
The size of the tissue paper will be the size of your pom. In this case, I used Spritz tissue paper from Target which is 16 1/2 by 24in.
This package was a great size and it comes with 8 sheets. You need roughly 8 sheets to make each large pom so perfect, perfect.
To get a variety of colors I used another type of Spritz tissue that was the same size but came in 20 paper packs. I calculated roughly $1.00-1.50 per pom to make them and that is simply the cost of the tissue paper. You can buy kits of these but they tend to be a lot more expensive and you still need to fool with it to get them nice and big and fluffy.
Next you want to decide on colors and stack your tissue paper out flat- one piece on top of the next and perfectly in line.

The tissue pictured above is 2 colors, so that will result in a 2 color Pom or just buy 2 packages of the tissue paper and do one of each color. For our party, I did the large poms in single color and smaller poms for the table in two colors. If you want two colors, just alternate the colors in your stack.
I prefer 8 sheets of tissue but you can do up to 12 sheets depending on how poofy you like your pom to be.
Next you want to fold the tissue from the shorter side in an accordion style about 1 1/2 inches thick. (So fold, flip the paper over, fold, flip it over again and fold and so on.)
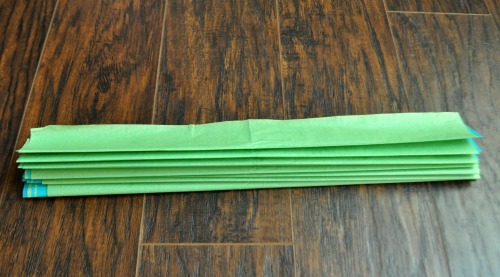
This is what it looks like- remember the little paper fans you may have made as a child? Same concept. It does not have to be absolutely perfect but just try to keep the papers stacked right on top of each other the best you can.
Next you want to fold your stack in the middle just to get a centerpoint. Fold it so the ends touch and you will have a little crease in the center to use as your guideline.
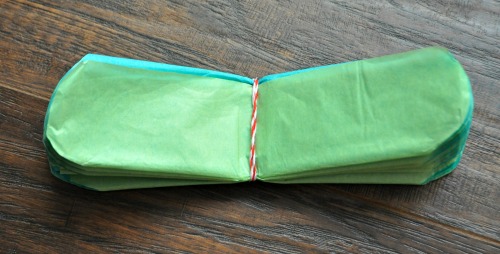
Take your string or whatever and tie the entire stack in a little knot. You don’t need to bend the tissue like crazy to get a super tight fit, but you don’t want loosey-goosey ribbon hanging off either. If you plan to hang these up, I suggest leaving a lot of extra string or ribbon on the end. You can use that extra ribbon to hang them in windows or from the ceiling and I just use a tack to keep them in place.
Now the picture above is for a small Pom so I actually cut the tissue paper in half and then tied each side in the center. This size is roughly the size of a cantaloupe on a table. Do not cut it if you want a big Pom- those will be a few inches larger then a basketball.
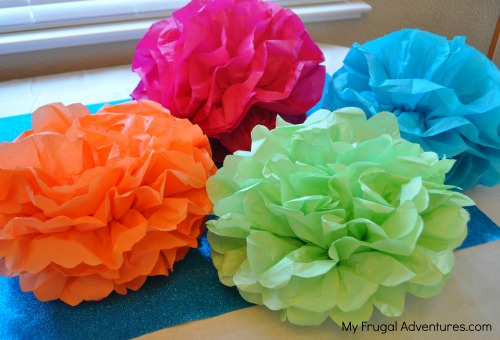
So the very last step is to decide what kind of end you want. Personally I like leaving the end in tact- I think they look more like Peonies but they are a lot harder to fluff out. The rounded edges like I did above are the easiest and they turn out really pretty. You can also cut your ends into sharp edges like a sword would look. That will give you a slightly different look to your pom. The Blue and Pink in the picture below have ends that I didn’t touch. The orange and green have the rounded edges you see above.

Now all of that stuff above should only take a minute or two. This next step is a tiny tricky only because you don’t want to tear the paper.
I promise you can do this though- it really sounds harder then it is. You want to use a firm hand with the tissue paper but try not to tear it. If you do tear it- no biggie. I bet you can’t even tell which of the Poms in my picture that I tore (’cause I did tear one piece and it all blends in.)
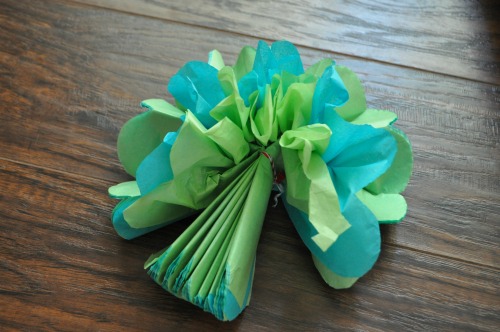
So flip it on the side like this and you want to start pulling each sheet of tissue up to start creating the big puffy flower look. Try to pull the pieces all the way to center where you have it tied in a knot. If you only pull it a little way up you will have this giant gap in the center of your Pom and it won’t look good.
See above the top sheet of green is pulled nearly to the twine knot I tied, and then the next sheet is just below that and so on.
Since these are 8 sheets of tissue, I like to pull up 4 sheets and flip the pom over and go to the opposite side and do 4 and then flip again and do 4 from the opposite direction and so on. You will get a nice round globe by doing that and it is much easier to pull them up.
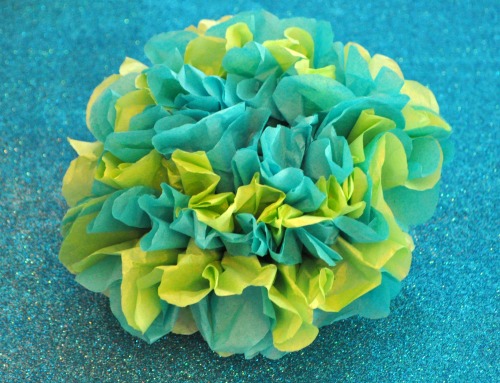
Here is the final product- again this is the small size so if you don’t cut yours will be larger:
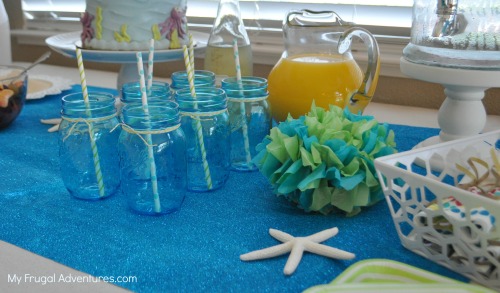
And here is how it looks on a table:
And if you like the larger poms, this is what they look like following the steps above:
So these were done the exact same way with the exact same tissue paper and again I used about 8 sheets of paper per pom. These can be just as cute hanging in a room as they are for parties.
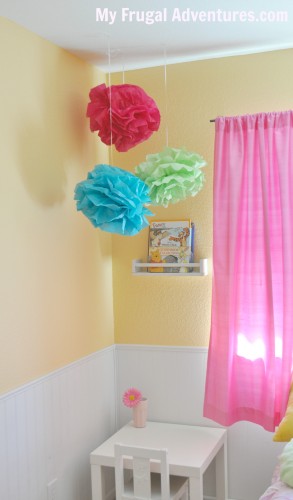
Here is what these look like in my little girl’s room:
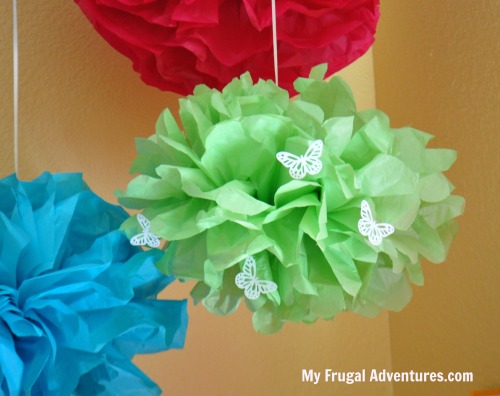
And one last little tip. If you want to embellish these a little bit it is super easy. Just use a paper punch or a craft machine (like a Silhouette) to cut the shape of your choice into scrapbook paper.
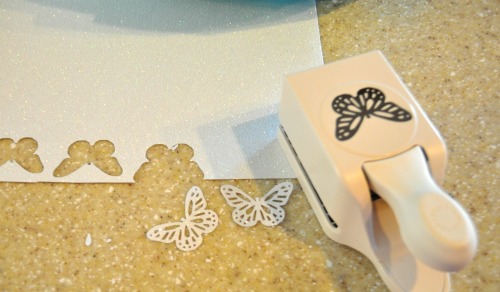
And stick them onto your Pom with hot glue or glue dots- and Viola!
So give it a shot for your next party and let me know how it goes for you!
Find lots more fun entertaining ideas on my Pinterest Party Board!
I will be making a few of these for my daughters party next month, along with the adorable rainbow cupcakes. Thanks for all the cute ideas!!
Oh good Nicole! Let me know how they work out for you.
This is awesome! I’ve been looking for something cheap and easy to do for my little girl’s 2nd birthday. I bought some of these for her last birthday and they were not cheap. Thank you!
How did you hang them?