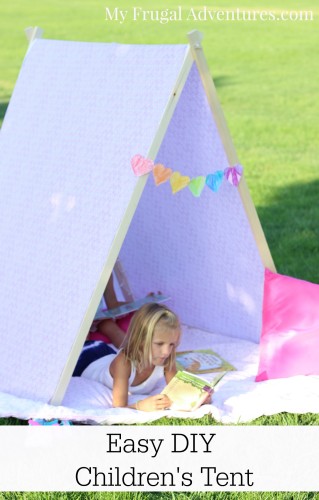

So my little girl turned 5 in May and we wanted to make her a special gift this year that she would really love. I have seen the idea of creating a little collapsible tent in the past and I really wanted to make one for her birthday gift.
My little girl loves to read so I thought this would be a special spot for that and also what kid doesn’t like forts and tents and little secret places to hide? I knew this was going to be a big hit.
I can tell you my husband made this really quickly- in just an afternoon and it was very cheap and easy to do. He built the frame and then I bought some fabric and really that was about it. We added a few extra accessories and now about 2 months later- both of my girls use this tent all the time. We mostly use it for reading books, occasionally coloring projects and we have taken it out to the park on a few occasions for fancy tea parties. When the tent does make a road trip to the park, we usually get swarmed with kids that want to come and check it out.
So if you have been considering making one of these for your kiddos- let me share the tutorial we used and some of the little extras we did to spruce up our tent.
I forgot to keep all the receipts for the project but I believe the materials were about $20. I bought fabric at Hobby Lobby with a coupon and I want to say it was something Like $8.00. So this is a really inexpensive project and when you are done it folds up and can be tucked into a closet or in the garage!

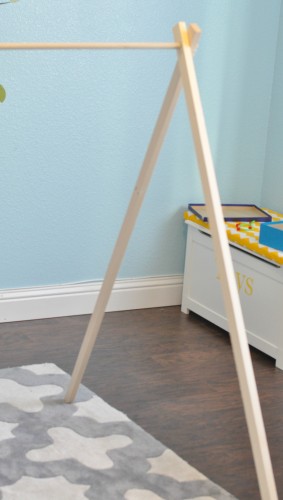
Here is what you need- a few simple cuts of wood. If you don’t have a saw to cut the wood at home, I believe the home improvement stores will do it for you and then you can just assemble at home.
- For the sides- (4) pieces of wood 60 inches long and 2 inches wide and one inch thick (we used pine)
- For the bottom- (2) pieces of wood 48 inches long and 2 inches wide and one inch thick
- The top is a 1/2 inch x 48 inch dowel rod pictured on the far left
We started by drilling a half inch hole about 3 inches high on all four ends of the 60 inch pieces at the top only. See how the dowel fits through the hole? That is where you want to drill your hole and line it up to feed the dowel through.
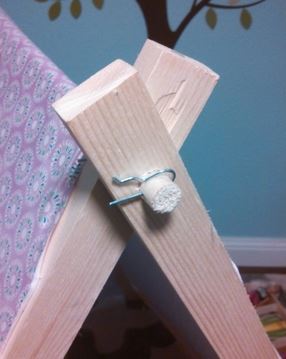
To ensure the wood dowel doesn’t pop out we used cotter pins to hold it in place like this:
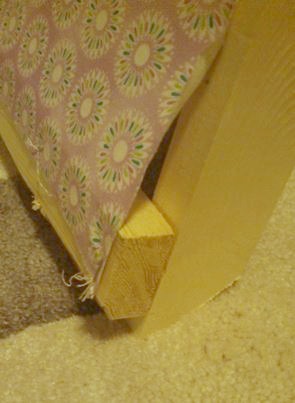
For the sides we screwed 48 inch pieces of wood to the taller X shaped pieces. Like so:
Once it is assembled you can paint this frame or leave it unfinished as I did.
I purchased fabric at the craft store and we just used a staple gun to staple the fabric to the frame at the bottom. Make sure to hold it really taut as you are stapling it together. Now this will cover the sides of your tent. I left it unfinished and the fabric perfectly fit from one side to the other side. If you are handy with a sewing machine you can always fancy this part up a bit and add a hem or curtains that pull back or tassels or whatever you like.
Originally we had both the front and the back of the tent open but my girls kept asking to have it closed so I simply bought another length of fabric for the back- stapled it on with the staple gun and then trimmed the excess off. Easy peasy!
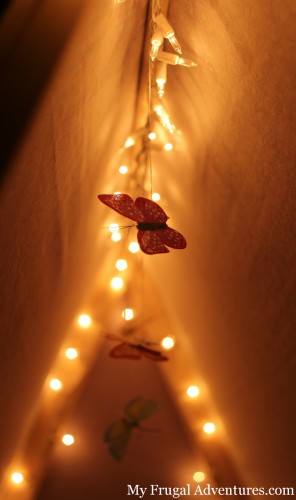
As for the inside of the tent, we added a few things. First we wanted twinkle lights for night time so I dug through the Christmas box and pulled out some little white lights and we stapled those to the frame. The tent is really pretty at night and if you have a rainy day at home, it is a very inviting and cozy little spot.
I also had a 4 pack of paper butterflies in the craft closet- I am almost certain I bought these in the Target Dollar Spot ages ago. I strung those up and tied them to the top of the tent so it looks like little butterflies are floating down. My girls love that! Here is the inside view of the tent with the lights on at night. We had hot chocolate in the tent a few days ago when it was drizzly outside and I turned off all the indoor lights and closed the blinds and we watched a movie together. The girls loved it.
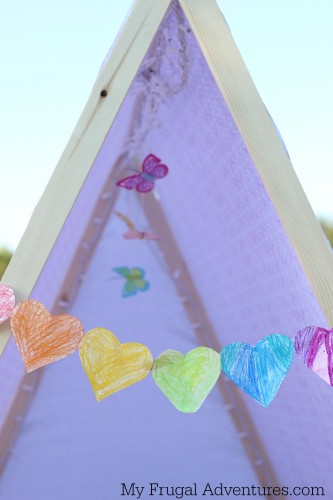
And last but not least my 6 year old made a special banner for the front- because what is a tent without a rainbow heart banner on the front opening?
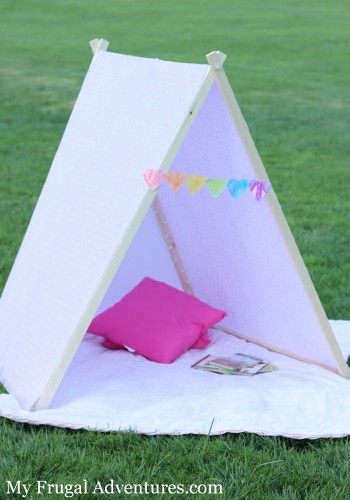
So that is it! Our cute little tent. Here is what it looks like kid- free. Don’t you want to just go sit under there and read a book?
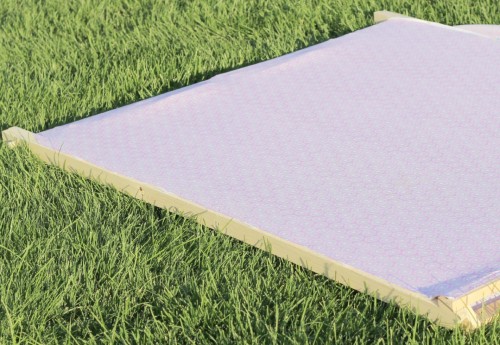
And when it is time to pack it up- it folds nicely like this:
So if you decide to give this a shot please come back and let me know how it worked out for you!
And if you like this post, here are a few other fun ideas to do with the kids:
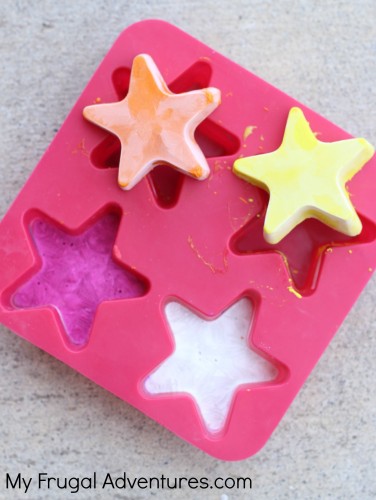
How to Make Freezer Chalk- this is so fun!
**This idea and the plans are based loosely off a great tutorial from Ana White.
Your tent looks great! Thanks for the inspiration!
This is such a cute idea!! My husband and I are going to put one together for our daughter this weekend. I hope it comes out as adorable as yours!
Hi! Great idea! What’s the angle cut of the bottom of the 4 60inch sticks? Where did you purchase the wood material?
Thanks!!
Would love to try it.
Bonnie you can purchase wood at any home improvement store. Look in the section with molding and such in the lumbar area. We angled the bottom just slightly but you don’t need to do that.
Yeah! I hope you like yours Jen– come back and let me know 🙂
I really need to make one of these. My daughter would be in HEAVEN!
I love this! I can’t wait to try! Visiting from the A to Z Link party!
Great tutorial! I’d love to try an oilcloth for the fabric– I live in the PNW where it rains a little, ALOT. 🙂 Pinning!
Hi Kelly- yes we used to live in Seattle :). Oilcloth would be amazing!
thank you for linking up at Share it Sunday. Sharing on FB today. Hope to see you soon.
How cute! I love this. I am going to have to try one for my little boy. Thanks for sharing at Artsy Corner!
You did a fantastic job! So cute! I’d like to invite you to stop by my weekly link party and link this up. http://www.thelifeofjenniferdawn.com/2014/07/a-little-bird-told-me-link-party-101.html
Awesome job on the tutorial! Pinning and {hopefully} making for my littles!
Please share this project at my Show-Licious Party on Saturday morning!
~ Ashley
G’day! Thanks for stopping by our #SayGdayParty!
Please remember to stop by and comment on other people’s submissions too and of course, hope you are following Natasha and me on Pinterest!
Comments and shares show you care!
Cheers! Joanne @ What’s On The List
I’ve been wondering how people do this, thanks for the tutorial!
Hi, thank you for the post. I plan on making one for my boys as a Christmas present. I have reread it and think I missing the length of fabric that you used. Could you please let me know?
Thank you again.
Hi Tanya- just measure your tent once the frame is done and that is the length of the fabric. 🙂
This was a great idea!! I think I may use Velcro for the fabric instead of stapling it, if I can get hubby to make one! That way you could wash the fabric if it got dirty or remove the back if the wanted too.
So glad to hear it Allison! Velcro is a wonderful idea too!
How much fabric did you get?
Hi Brittany,
Once your frame is built you can measure to see exactly how much material you need. You might go with your own measurements because our tents might not be exactly the same size.
For a rough estimate the side pieces are 60 inches each so 3 1/2-4 yards of fabric would be plenty.