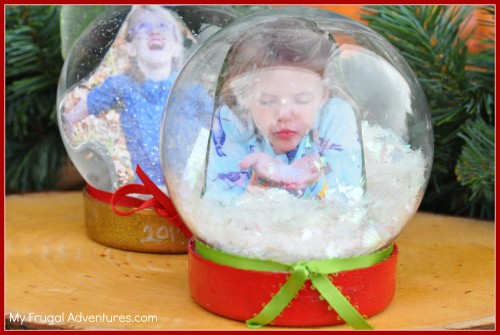
I thought I would post these cute little Snow Globes this year as an idea for something to do with the little ones this year.
I have been making these little snow globes for a few years now starring my sweet little girls. I think these would be fun if you have a pet that is a member of the family too. I have a picture of my dog, Milo, in a Santa Hat from a few years ago that would be perfect for one of these.
Snow Globes are so simple to make and really inexpensive. I love looking at how the girls have changed from year to year and the kiddos can spend ages sitting and shaking away at these things.
Here is what you need:
- A clean, empty jar or plastic snowglobe from the craft store
- Pictures of your child- preferably laminated
- Glitter
- Various items to stuff inside the snow globe
- Spray paint for the lids (optional)
- Hot glue gun
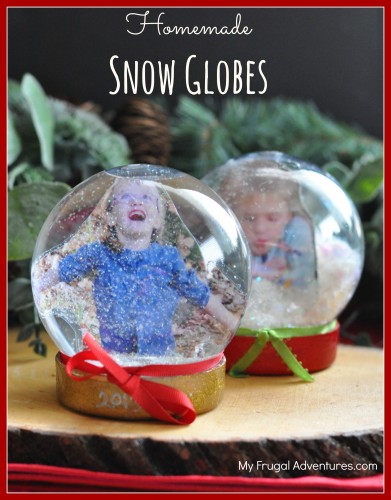
So you can make a wet snow globe or dry snow globe depending on your preference. A wet snow globe actually has water inside and the glitter shimmering around or the dry version has no water. I have one of each so you can see the difference. In the picture above, I used no water and in the picture below it has water.
You can either use an empty jar or you can find these little plastic snow globes for about $2 with a coupon at the craft stores. I prefer the plastic because my kids love to play with these things and we have hardwood floors so plastic is for sure a better choice for us.
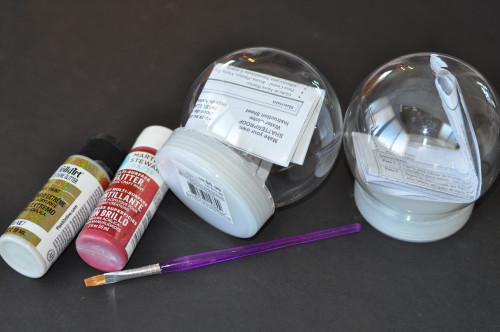
I painted the bottom of the plastic snowglobes with spray paint and then once that dried I did a quick coat with a glitter craft paint for a little extra sparkle. One is gold and one is red. You can leave the bottoms white and just tie a ribbon around instead if you prefer.
While that is drying, you can laminate your photo. This year the girls did poses to look like they are in the snow (even though it is still warm and sunny in California.) One of my girls is jumping into the air and my other daughter I gave a handful of glitter and she is just blowing it. You can use any kind of photo you prefer but I tend to like these silly and fun ones.
I have a laminator that I used but if you don’t have one, it is very cheap to do one page at an Office Supply store. You don’t have to laminate your pictures but if you want to be sure your keepsake will last year after year it might be worth the extra step.
Cut your photo to a size that fits your container and in a shape you like.
Next I did a little strip of hot glue on the base of the snow globe and put the photo in the center of the glue. I just propped the craft paint I was using behind the picture to make sure it stayed upright while the glue dried.
Next you want to decide what to include in your snow globe. In the past I have used little plastic cranberries and little pieces off the Christmas tree. I have also used plastic poinsettia pieces, fish tank gravel… the possibilities are endless. If you want to make a wet snow globe be sure to use things that won’t dissolve in the water. I used a plastic glitter poinsettia leaf a few years ago and it has gotten a little gunky over the years. This year I just decided to skip any extra embellishments but check the craft stores or your holiday boxes and there are so many things that you can use in your globes. (The aisles where you find Christmas trains and the town sets often have cute mini trees and such that would work.)
Our wet snow globes have held up for a few years now but last year the girls untwisted the snow globe and one of them leaked. So this year I decided to try a dry snow globe with something that looked like snow.
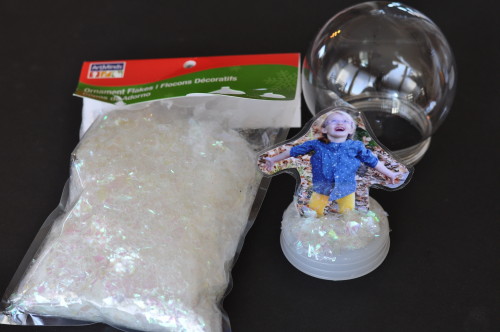
I found these ornament flakes for about $3 at the craft store. It is like chopped up cellophane flakes. I used hot glue around the rest of the base of the globe and adhered the flakes to look like mounds of snow at her feet.
Then I took several pinches of the decorative flakes and put them in the bottom of the globe. Gently place the photo bottom into the globe- you might want to pinch the photo a bit to help it fit inside the globe. Secure with the base and viola!
All done! Shake, shake, shake and it looks like snow is falling. You can easily substitute glitter for the little flakes I used.
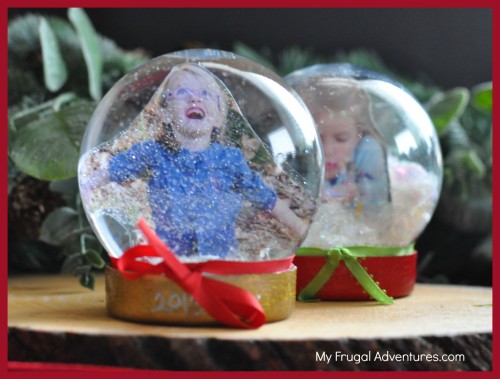
If you prefer to make a regular snow globe with water, you just want to add glitter to the bottom of the globe. Pour water into the globe until it is full and slide the photo inside and secure the base. Now shake, shake, shake! The one directly above of my littlest has water and glitter inside. That is the glitter after a few seconds as it settles.
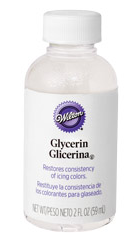
You might consider picking up Glycerin or Baby Oil and add just a bit to the water. This will make the glitter fall a little more slowly in the snow globe. Wilton Glycerin can be found in cake decorating sections at the craft store or Walmart for about $2.50. You only need a tiny bit- maybe a teaspoon or so.
And that’s it! All done!
A few extra notes:
Since my snow globes are round, I wrapped a dish towel in a circle on the counter and nested the globe inside. That allowed me to add the glycerin and to put the base photo in without having to hold the globe with one hand.
You can hot glue your base sealed to prevent the children from unscrewing it. I prefer not to do that because I like to change the water and glitter each year. It might be smart to remove the water and let the inside dry before you store it year after year. (Not necessary but just a thought to keep the water from getting gunky.)
Our oldest snowglobes are from 3 years ago and they still look nice. I have freshened up the water and glitter and that is about it for maintenance.
I think I may have seen this idea in Family Fun years ago- can’t remember where the idea came from but it is a tradition in our house.
Here are a few other ideas for ways to design the snow globe if you don’t want to have your child’s photo inside.

1. Woman’s Day Magazine, 2. Zest Digital Mag 3. Martha Stewart
If I can find some cute little figurines of Disney Princesses I might try to do a fun little character one for them too.
See more ideas for crafts, decor and recipes for the holidays on my Pinterest board.
This is great! Can you please tell me which craft store you find the snow globes? Thank you!!
Hi Ashlyn, I know for sure Michaels has them and I am almost positive Hobby Lobby does too.
Great, thank you so much and thanks for the great idea! I am going to makes these for the grandparents this year. 🙂
me encanto la idea de los globos de agua para realizar con los pequeños y ademas lo de la foto esta increíble y muy original para un bonito recuerdo gracias por compartir tus ideas.
I LOVE your snow globe! Where did you find the globe? I can’t find round ones anywhere thank you
Hi Adilene- I believe that one was from Michael’s 🙂
I love this! Going to make this for my child’s teachers as thier Christmas gifts. so cute and One of a kind….
Yeah! Glad to hear that Amanda. We made 1 for each child and they liked them so much I went back and got supplies for 7 more for teachers 😉