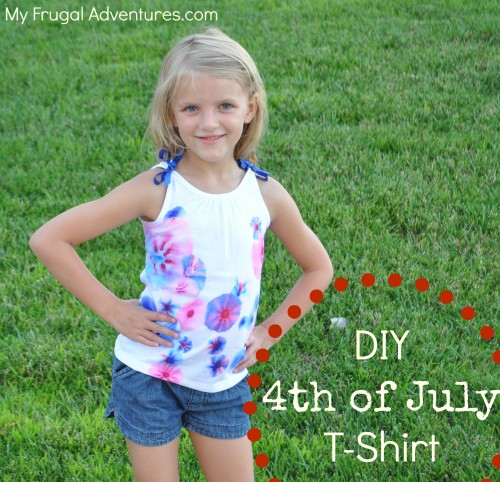
We have had swimming lessons and VBS this week so I am getting today’s Funner Summer post up a little later then I hoped. I am volunteering to lead a class of 11 first graders so it has been quite a week- not to mention the sudden heat wave. We are supposed to hit 105º tomorrow- yikes!
So anyway, this is a very easy little project if you want to do a last minute patriotic t-shirt for the kiddos. It is inexpensive and fun and most likely you have what you need on hand.
This can be done in so many patterns and colors- it would be great for Girl Scouts, birthday parties or any kiddos you have that just want to make something totally original.
I promise this is simple- here are the basic steps- color, add alcohol, dry, iron, done!
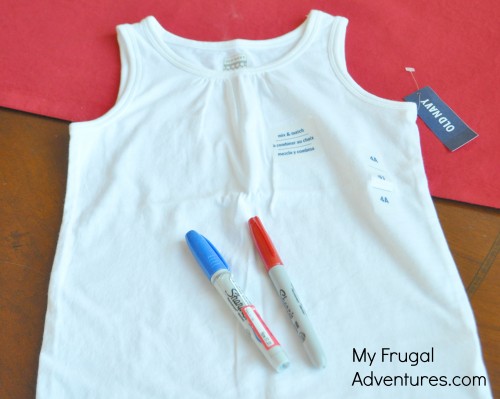
The ingredients you need to pull together:
- Plain shirt or any other clothing item you want
- Sharpies in any color
- Isopropyl Alcohol
- Eye Dropper
- Iron
- Cute kid
And to get started you want to put something in between your clothing item to avoid bleeding colors. I used a Cheerios box but cardboard works great or whatever you might have on hand.
My tank was from Old Navy and it was something like $4.90 with a coupon. I believe Walmart might be even cheaper. (Or this would be a great disguise for a white shirt that isn’t so white anymore.)
Then you want to create a design on your shirt by simply using the Sharpie. You can do stripes across the shirt, zip zags, write words, stars, hearts, circles dots…. whatever you like. We were going for a Firework look so I did mostly circles with dots around it.
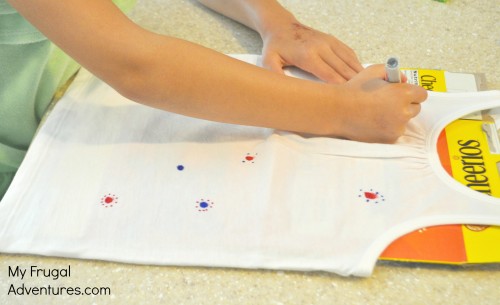
Actually I did about 10% of this project and my 5 year old did 90%. She made the circles all over the shirt and I just touched up a little here and there.
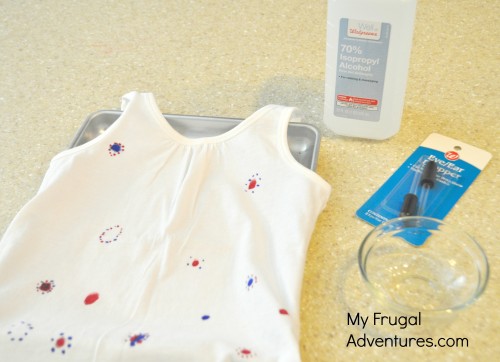
Once you are done with that you want to get a tiny bowl or cup or whatever to squeeze your alcohol. You don’t want to drench the shirt, just drop on the alcohol so an eye dropper is nice to use. For this step a tray of some sort is nice to use so that the wet drops have something to land on. I took the little tray out of the toaster oven and used that. Make sure to line it with paper towels or foil or something because the Sharpie ink will drop though and suddenly you have a tie dyed toaster tray.
As you drop the alcohol on the shirt, the ink will spread so it creates a very cool almost tie dye pattern.
We did ours minimally and then after dropping the alcohol went back to fill in more. I found if you try to aim the dropper right in the center of the ink it seemed to spread the best and try to drop it really close to the ink.
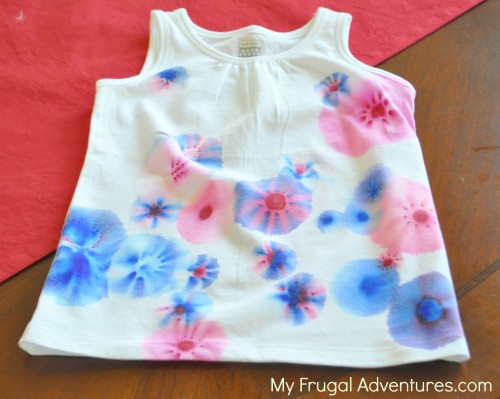
Viola! Now the ink will be wet so you want to be super careful. My little girl got excited and yanked the shirt on and that caused my fingers to turn blue trying to get it off her and we got a few little smudges on the shirt. No problem-o though because you can always fill in the smudges with more ink balls and somehow my fingers always seem to be blue from our craft projects anyway- so que sera sera.
So you can let this dry inside overnight or I used the hairdryer to get it to dry in about 3 minutes. The next step is to iron your shirt for about 5 minutes. This will help to set the color so it doesn’t fade in the wash.
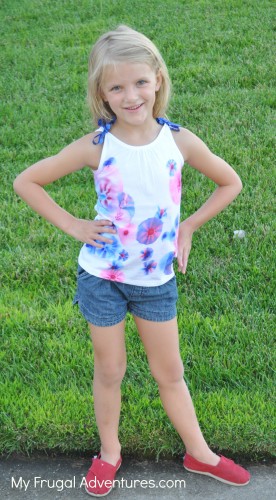
And that is it!! Very fun and unique and I think it turned out really cute. I had some sparkly blue ribbon so I just tied that on the sleeves in a bow.
Now red and blue are not my little girl’s favorite colors so I grabbed one of her little undershirts and made some designs in all sorts of bright colors and it turned out really vibrant and fun. I think this is a happy shirt for a happy little girl.
You can wash this since it is permanent marker. Our blue stayed very bright but the red faded quite a bit in the wash. You might go heavier on blue for your shirt.
This idea is courtesy of Martha Stewart. Yeah for Martha!
*One safety tip- this is alcohol. It smells strong for the first few minutes and then that smell disappeared for me. Just keep in mind you want to be super careful with little fingers and alcohol and Sharpies.

This post is part of the 30 Days to a Funner Summer Series.
You can catch up with the entire series with recipes, crafts, articles and more here.
This would be a great way to save some of my kid’s stained shirts and dresses! I wonder if my 3 year old could manage it without too much of a mess…
Is the finished product machine washable? I’m not doing anything that requires handwashing, yo! 😉
Yes Beau wash the first two times by itself so the colors don’t bleed to other laundry.
That’s it. You’ve now made me want to be crafty….which is no small feat. Thanks for the cool idea, Charlene.
Love everything you do Charlene! Have been reading your blog for several years now & ‘borrow’ tons of your ideas, so THANK YOU!!!
This is a super cute idea & I will be borrowing this one too 🙂 I have my sister & her 4 little ones coming to town for the 4th & I think that this will be such a fun craft for them before the party starts. Keep all the great ideas coming!
Thank you. We did this today and it was a great project for both my 7 year old and 3 year old. They both turned out so cute and we plan to do some shorts next!
Sara, I am so glad! I hope your colors hold up in the wash- our red faded a bit.
LOL- my max is usually about 3 steps for crafts so this was right up my alley :). I think it would be a fun idea for those horrid shirts they give you for fun runs and stuff too.
Would this work with a regular pair of shorts, or would they have to be white?
They kinda look like flowers.
You could draw stems or vines for a different look.
This is such a fun idea
Thank you for the great idea. We just did some designs on pillow cases because my kids were at home with me today — and bored out of their minds. This provided about three hours of entertainment. And I know it’s something that we’ll keep for a long time. They just declared they are never using other plain pillow cases ever again. : )
LOL Jessica! So glad to hear it 🙂
Ours looked nothing like they should have as some permanent markers/colors (including Sharpies brand), do not bleed when exposed to isopropyl alcohol. We had 3 colors that didn’t budge at all.
Suggest testing all markers and colors on a scrap /rag before proceeding so you know what you’re getting and have a chance to practice first