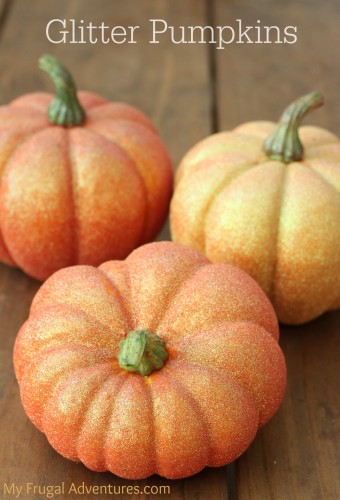
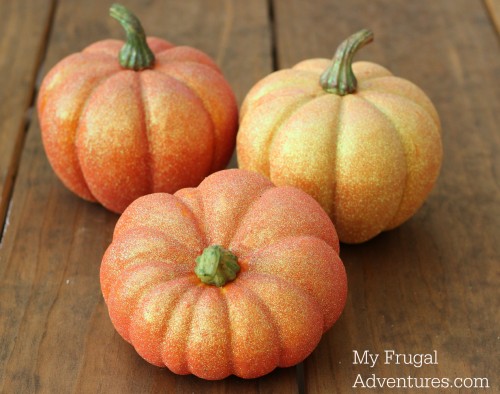
I wanted to mention these little glitter pumpkins for those of you looking for some fall crafts with the kiddos.
The girls and I actually made these awhile back and I really loved how these turned out and they are really simple to do. They are much prettier in person and the glitter really sparkles in sunlight or in the evening with just a porchlight.
And if you are thinking these might not be worth the bother- the pumpkins you see above are literally 4 years old. They have not been stored carefully but rather shoved into storage tubs after the holidays and I think they still look lovely.
So just a little effort now and you can have something that lasts for ages and ages.
You just need 3 things to make these pumpkins and you can do them in several different colors. I think they are perfect for fall/Thanksgiving decorations or Halloween and you can use fake pumpkins or real pumpkins.
I have tried this with real pumpkins and it doesn’t look nearly as pretty. These pumpkins are artificial and I bought them at Michael’s for about $5 each. You can find pumpkins cheaper at the Target Dollar Spot or the Dollar Store but I have found the better quality pumpkins look much, much better then the cheaper pumpkins. You will get a nicer stem, more realistic colors and a diversity of sizes and shapes.
To get started you simply want to wipe down your pumpkins so they are free of dust and dirt. Next you want to methodically paint on some sort of adhesive in long strips around the pumpkin. I did this in sections because the glue dries quickly but you want to make sure to paint on the glue in a stripe from top to bottom so you get a perfectly glittered surface and not splotches.
I used Martha Stewart glitter glue but I think Elmer’s glue, spray adhesive or Mod Podge would work as well. If you use a spray glue make sure to use painters tape on the stem of your pumpkin to protect it.
- I laid my pumpkins out on craft paper (or a paper plate depending on the size).
- I worked in sections around the pumpkin but the glue dries quickly so just do a section, pour glitter to cover the section well and then move on to the next section until you are finished. For a smaller size pumpkin, you can probably do it all at once.
- You can either fold the craft paper or a paper plate and pour the excess glitter right back into the container.
- I didn’t touch the stems but you can paint them brown or green if you like.
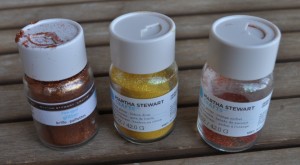
The glitter is important to get a super sparkly pumpkin. I like Martha Stewart glitter because it comes in gorgeous bronzey, orangey, mustardy colors and it is super fine. If you don’t have Martha Stewart any brand will work just make sure it is super fine and not thick, chunky glitter.

One warning though is that super fine glitter does tend to stick to everything so be careful transporting your pumpkins around as you may have a trail of glitter :). I didn’t find this to be a big problem but I can for sure see a fine spinkling of glitter underneath where I rest the pumpkins. You can put a sealant on top of the pumpkins to be really sure the glitter doesn’t come off.
Here are a few other crafts you might enjoy:
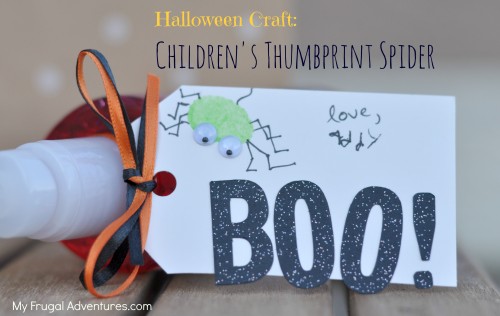
Cute thumbprint spiders for kids

Charlene – These are just AWESOME!!! Thanks for the tips.
Love those ideas! My girls and I just pick up some pumpkins this afternoon. Anyone looking for cheap pumpkins, they are 2 for $6 at Fresh and Easy and they are medium size. I think that’s a pretty good deal!
Cool! I’d been wanting to try some of these this year. LOVE your tutorials! It’s nice to see what can be done with the savings.
Thanks for the match-ups this week (and every week!). Just got back from Target (Ragu and Lipton went perfectly), Rite Aid (Nail Polish worked great, and my 4 year-old is a VERY excited little girl. LOTS of glow-in-the-dark colors), and used that Jo-Ann coupon for a Halloween project. Thanks for everything!
Thanks Kelly! I wish my photos did them justice… still learning ;).
Oh cripes thanks for the reminder Katie! I need to stop at Rite Aid on the way to Pilgoga. I would have totally forgot.
They look great! I’ve made these & if you spray them with a clear spray paint, the glitter won’t shed. They still sparkle, but it helps them hold up year after year.
If wish I had seen this and been able to use the great coupons some of the craft stores issued for Columbus day!!
Jessica,
I believe all the same coupons are still available.
http://myfrugaladventures.com/2012/10/hobby-lobby-and-michaels-coupons/
http://myfrugaladventures.com/2012/10/joanns-coupon-50-off/
I love glittered pumpkins and these are adorable. Thank you for sharing at Share It One More Time. Cathy
I love this idea! I do want to carve at least one real pumpkin this year, but I like the idea of having some reusable pumpkins that will look nice for Halloween AND Thanksgiving.
I love these! Last year I painted gourds with iridescent paints and I realized it’s the easiest way to add the color story you want to a holiday setting. Your glitter pumpkins are wonderful… 🙂
Fall cuteness! Love it!
These are so pretty, Charlene! Thank you for sharing at last week’s Project Inspire{d} ~ your pumpkins were featured in this week’s What a Great Idea roundup. Pinning 🙂
What a great post!!! Congrats on being featured last week on The Wednesday Roundup Link Party!!! I’ve also pinned this one to our Features board on Pinterest {http://www.pinterest.com/anglemoine/the-wednesday-roundup-features/}. The Wednesday Roundup goes live every Wednesday at 7am est, we’d love for you to come by and link up again!
Angela ~ LeMoine Family Kitchen