This shop has been compensated by Collective Bias, Inc. and its advertiser. All opinions are mine alone. #SamsungGS8atSamsClub #CollectiveBias
Do you have 8 zillion photos on your phone or on your camera? Feel overwhelmed at the prospect of combing through them all and getting organized? I am totally with you my friends. So many photos and so little time.
I was so incredibly behind on organizing photos that I actually have two very old laptops in my office closet that I can’t part with because there are so many photos stored on them. (Yes I am serious. Stop judging.)
The thing is my children love photobooks. And they love to look at pictures of themselves as babies and toddlers. I love photobooks as well and envision a beautiful stack of neatly organized and beautifully curated family photos for each year. And photos are priceless. They really are. Ask 100 people what they would grab if the house was on fire and the majority will tell you family photos right? Its the first thing that comes to my mind for sure.
So about 6 months ago I set out to really get my act together with photos. Editing, deleting and organizing and actually getting my photos off my phone/laptop and into books for everyone to enjoy. My Instagram buddy Jodi helped me get started on this project and I thought I’d share some tips with you that might help.
Jodi takes stunning photos and manages to sort, edit and organize them into gorgeous photobooks that represent each year. I want to be Jodi when I grow up. If you do too- here are some tips to get started.
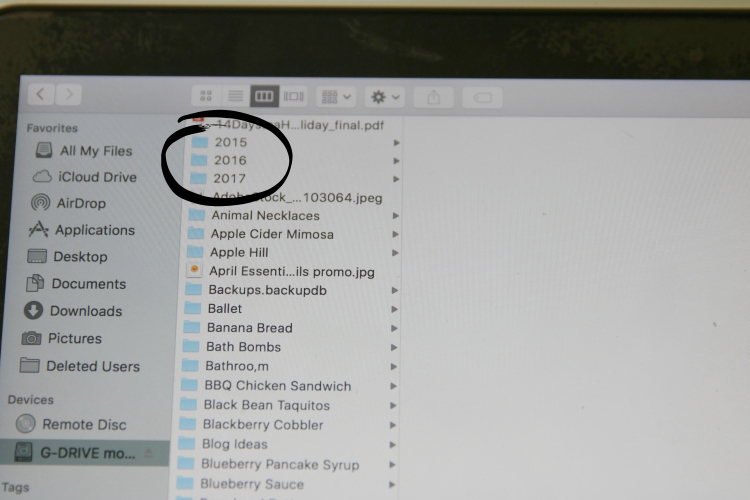
1. We are going to get started from today forward and we will set a plan for older photos in a bit so not to worry. You are going to create one folder for the entire year. I organized photos by season in the past or by events and it just gets so messy. It is much easier to just create one main folder and then we are going to put several subfolders under that. You will need to decide where you want to store all your photos. I have a laptop with very little storage space so I purchased an external hard drive ages ago and I store all my photos there. Some people prefer to use the Cloud or do both for a backup just in case. If photos are precious to you, having two backup sources is a great idea. So go ahead and create your master folder titled 2017.
(Note: I store all my blog photos on the same drive under the name of the post. My external hard drive was about $100 and I have tons and tons and tons of images on there and I am not even half full. So the investment has most definitely paid off.)
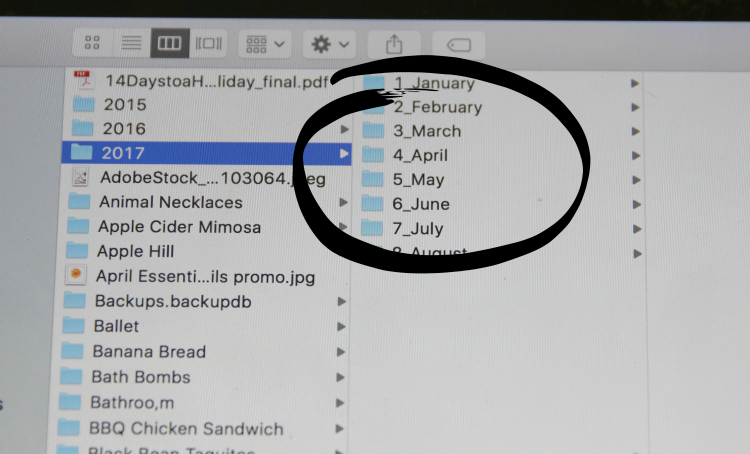
2. Now create subfolders by month- January, February, March and so on. Some months might be super light on photos and some might be bursting with them. If it is a light month on photos, great! You can probably just keep them all under the month. If you had an eventful month, you might consider adding additional subfolders with specific titles on them. An example might be folders for a child’s birthday or a vacation or other major event. One extra folder you might consider is anything that is the same types of photos that occur year round. In our case, my girls play year round soccer and in 2016, I just had a general soccer folder for the entire year. (So one for each month plus a 13th folder just labeled soccer.) I thought that might be a good idea because there were so many photos and I didn’t want to have to remember “wait what month was that tournament? Wait when did we play that game?” This year I decided to go back to strictly organizing by month and you will see why once I get to the photobooks section. But that extra folder for activities that are ongoing might work for you. If my husband and I decide to build a house, I would most likely have a 13th folder that is just House Updates documenting the progress of construction. These are your memories so feel free to organize in the way that makes the most sense to you.
TIP: If you add the number of the month up front as you name your file, the files will stay in order and not alphabetical. (for example 1January or 1_2017. Otherwise the months will be alphabetical and not in order).
Now we have one folder that says 2017. We have subfolders under that 2017 that say January through December.
Starting from this month only, set a time on your calendar for photos. This has to become a chore you automatically do- like changing the oil on the car, going through bank statements, visiting the Dentist. Set aside an hour each month, just for sorting and purging. I typically do this at night over a Netflix marathon. Monthly works for me but go ahead and go weekly if you feel more ambitious. I would not recommend going longer than a month because guess what? I have a laptop from 2011 in the closet my friends! A month turns into two and then twelve and then suddenly the kids are going off to college and you still haven’t started the baby book.

I don’t do a folder for each photo because it can get out of hand. In July for example I might have a handful of fireworks photos, two from a play date, several in the pool, a weekend trip… that seems like overkill to me to have a folder for each event. Instead I might put 50 photos from a trip into a subfolder labeled Disney vacation or whatever and then lump the handful of photos from the rest of the month under 7July and leave it at that.
3. During your hour time block each month, transfer all the images from your camera to your computer, download any pics on text message or email and purge. This is something I have gotten better about- I really look at each photo to be sure it makes the cut. Just today I downloaded 100 photos from a soccer tournament and kept 10. It is hard to purge photos because those kids- so darn cute right? But I try to look at the overarching goal here- preserving memories. If I have 200 pictures under each month, that is 2400 photos per year to try and sift through. Your memories become a burden instead of a gift. So purge and just keep the best of the best.
Tip: You can rename your images if you like. Most images will be called 2017889gt688 or whatever straight from your camera so you can always rename them to make searching even easier (i.e. Zoo Trip or pool day or slumber party etc…)
4. Your phone. I bet the majority of the pictures for most people are on a phone. We are not going to tackle all 8 million photos today- we are going to focus on just this month. Zip through your phone photos and videos and delete, delete, delete any junky, dark, out of focus photos from this month. You don’t need 40 pictures of your beautiful child in their Halloween costume. Just a few will preserve the memory and make the photo that much more special to you. The keepers are going to need to be transferred to your computer or to your Cloud or hard drive. I transfer everything to my laptop and then connect my external hard drive to my laptop and sort all the images into the correct folder. Very simple, non techy and couldn’t be easier.
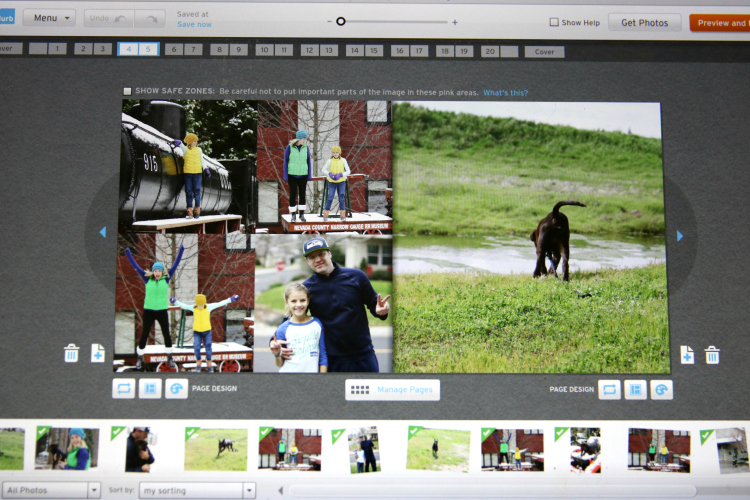
5. Now you are pretty much done! So exciting right? But one last little step… Decide if you want to do photobooks or print those darn photos out! I do one book per year and then mini books for special trips and a Chatbook for each of my children for birthday memories. Go back through the photos and decide which are your absolute favorites. You can start a photobook with a page or two for each month of the year. Some months might be bigger, some smaller…whatever. Drop the photos into your photobook and add any notes you might like or little inside jokes and memories and save the book to your account. Once December rolls around you will have the entire book done and ready to send to print. Here is a sample from one of our January page layouts. (We got a new puppy from Santa so the picture of his little behind cracks me up.)
This is why I changed my mind and decided to organize soccer photos into months. When I went to do the photobooks it was easier to look at July and say oh we did this, we did this, this was a great moment and we had that tournament where Maya got a trophy and I better include that in the month summary pages. Easier than going through the event folder labeled soccer with a year of photos and trying to place those chronologically in our book.
And don’t skimp on printing your photos! My girls have picture frames in their rooms and little bulletin boards and I change out the images all the time. I print large size images too and change out the pictures in a gallery wall in the living room. What is the point of all this effort if you aren’t going to enjoy your pictures?
*TIP: Bonus points here to clear clutter too. If you have children that do lots of art projects or crafts or little school assignments, you might consider photographing those and adding them to your monthly folder and then tossing the actual item. That adorable family picture colored by a 4 year old is even cuter when the 4 year old is standing and holding the picture. I don’t always have my child’s face in the photo, sometimes I zoom in and just have little chubby fingers and chippy nail polish holding the item out for me to photograph. Now you can toss the actual piece and save yourself on some clutter while still keeping the memories. (And seriously aren’t people drawn with big circle bellies and stick legs just the best pictures ever?) I love to add the special crafts and art projects to our annual photobooks. It makes them more interesting and just takes you back to that precious time in your child’s life.
That is it! Organized photos that are a blessing not a headache.
And I promised we would figure out what to do with those older photos. Not to worry. What I suggest is getting into a groove of monthly photo organizing and then when you feel like you can turn this from 60 minutes to 90 minutes, consider going to the prior month and slowly working your way back. If you keep at it, all of those photos and videos will be off your phone in no time. Try to get into a habit when you have a few minutes in line somewhere or school pick up to flip through photos instead of clicking on social media. Use those few precious moments to delete and edit your images so the process goes even faster at the end of the month.
And now that you stuck with me for all of that I want to share a tip to get stellar quality photos even without a fancy camera. I do take my DSLR with us all the time. It is cumbersome and heavy but I just love capturing all those special moments with our family. I have an older phone and the camera on it is pretty awful. I rarely use it for photos because they come back with bad lighting and grainy. I am almost always disappointed with the quality.
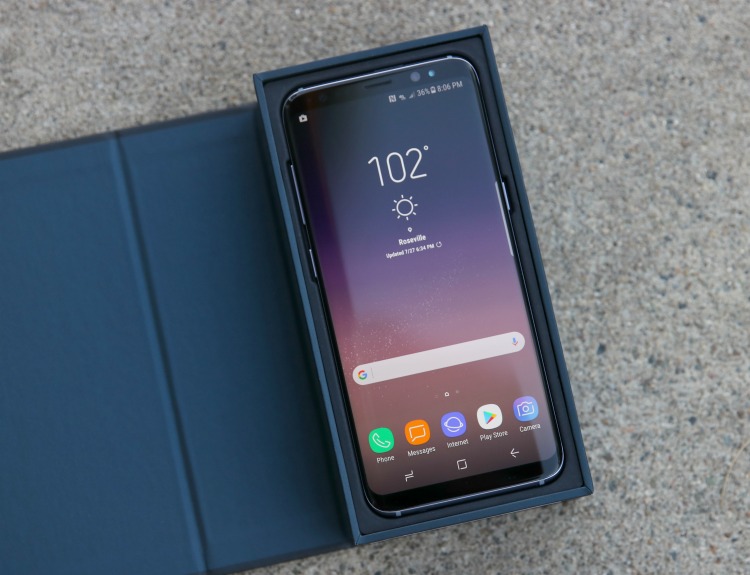
I was given the opportunity to test out the new Samsung Galaxy S8 recently and I want to tell you about an amazing deal on the phone plus tell you a little about the features that might just convince you that you can get beautiful, sharp images right from a tiny little device in your back pocket.
The Samsung Galaxy S8 has an infinity screen, which means the screen stretches from edge to edge. The Samsung Galaxy S8+ has an even bigger infinity screen if you want something slightly larger. If you do take lots of photos and videos, there is MicroSD card that you can purchase separately to expand your storage by 256GB.
I purchased this phone on a Thursday and took it with us to a soccer tournament for the weekend. I was so impressed the first night using this phone! We were at the hotel pool with the entire team, in a low lighting situation as it was getting late, tons of activity and chaos in the background and normally I would be fussing with the settings on my DSLR camera. Instead I just grabbed my Samsung, had the girls sit on the edge of the pool and the photos are gorgeous! Really gorgeous! The lighting was perfect, the colors nice and vivid and best of all it is completely in focus and sharp- even after I zoomed in.
Oh and I want to mention one more major perk to this phone. The second photo was of the team jumping into the pool together and guess who got completely soaked sitting on the edge snapping photos? This girl! With my old phone I would have panicked as water is the enemy. With the Samsung Galaxy S8, it is water resistant! If it gets wet or an accidental dunk, the entire phone won’t die on you and you won’t be racing to fill a bag with rice and saying a prayer. I just grabbed a pool towel and wiped it off and the phone was completely fine.
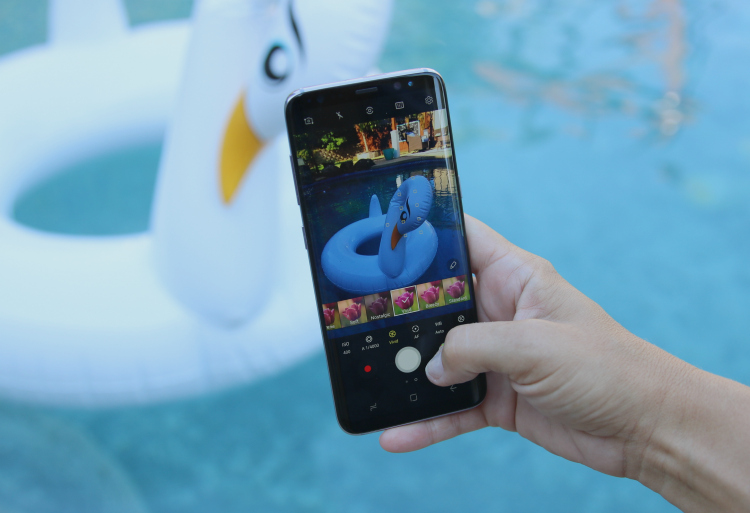
And if you enjoy photos and want to get beyond auto modes, you simply swipe on the camera to get advanced settings that you can use for your photos! There are some auto settings like Food, selective focus, slow motion, panorama and more. Or click on Pro and you can adjust the ISO, white balance, color and more…

The difference in image quality is truly night and day between the Samsung Galaxy S8 and my older phone. As I was looking at the photos from the weekend I was really pleased to find I really didn’t need to do any editing and I couldn’t tell the difference between my Galaxy S8 shots and my DSLR shots.
Here is a sample shot- this was taken quickly as we were crossing the street. I literally yanked the phone out of my pocket and quickly snapped- I didn’t adjust the settings or even stop walking and I think this shot looks great. I did zero editing on it except a slight crop (which you can do right on the phone by the way) and that was it.
If you are interested in upgrading your phone, I have an awesome deal to tell you about.
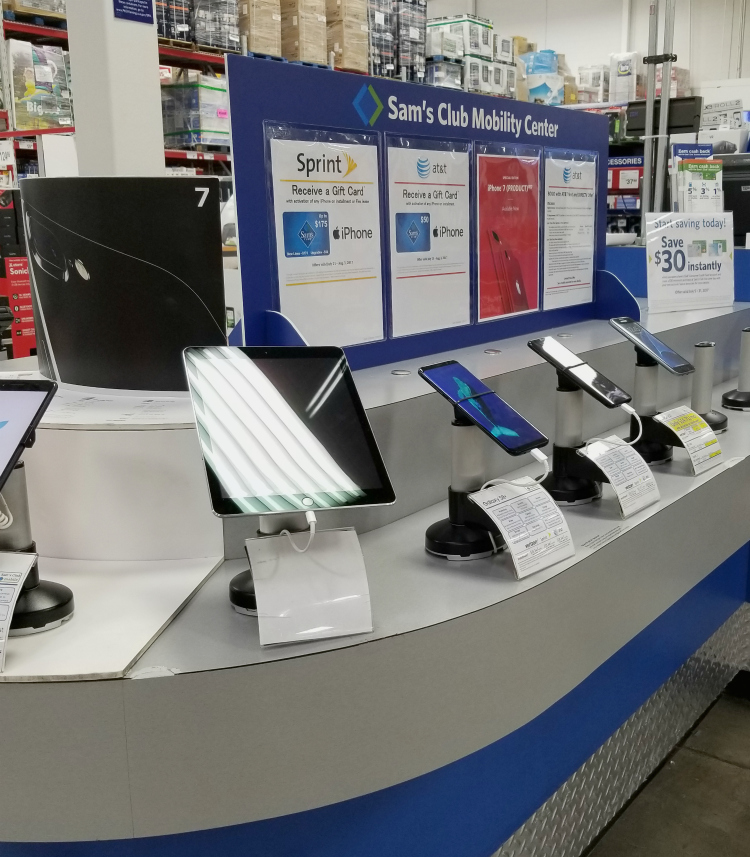
On August 5, 2017, you can head into your local Sam’s Club and get a whopping $350 Sam’s Club gift card back with purchase of a Samsung Galaxy S8 or S8+.* That really is an amazing offer. When you go into Sam’s Club, look for the Sam’s Club Mobility Center. You will find an actual person that is well informed about the various phones and the service contracts and they will be able to help you with your purchase and setting your phone up. The mobility center is only for cell phones so the staff are knowledgeable and my experience was excellent. The offer is for purchasing a new line or upgrading your existing phone and you can continue on with your existing carrier or switch to a new carrier.
*One gift card per activation on installment. Limit five gift cards per membership. Gift card will be provided at the time of activation and may not be used toward same transaction or to pay for membership fee, or select services. Subject to all terms of Sam’s Club Mobile Secondary Retail Agreement. This offer may not be combined with any other offer promotion. Limited time availability. Offers subject to change. Carriers, coverage, and products may vary by location. Devices may require select plan and data subscriptions, credit approval, activation fee and termination fees. Upgrade eligibility may vary. 4G not available in all markets. See club for details. This offer is not valid online. Limit of five phones per membership.
I hope this has been helpful to you to get those pictures off your phone and into a photobook. If you have additional tips and recommendations, please leave a comment below!
This is one task I’ve definitely been putting off. Great way that you’ve broken it down makes it seem ‘do-able.” It’s great when your phone is so good for pictures – both quality and storage! #client
Great post, Charlene! I already do a lot of the tips you mentioned here, but I haven’t made ANY books. All of my photos are still on my computer/hard drive. What photo books have you found that you like the best? Also, I love the suggestion of setting aside an hour each month. After I lost a year worth of photos and videos when my computer crashed and I hadn’t backed it up, I was more diligent about putting things on an external hard drive, but it has been a few years now and I have gotten lazy again. Thanks for the reminder of how important it is to do!!!
Hi Kimberly! I have always used Shutterfly but this year I am trying Blurb. I have seen Blurb books and they are stunning in person. The only complaint I have is that the book maker program doesn’t work well with Chrome. I have to open everything in Safari. They are super expensive- all photo books are these days- but there are usually 40% off sales every few months and a lot of deals around the holidays.
At the beginning of the month, I finish all the bank account reconciliation and then I do the photos. It is easy to remember and just get it done when you know every month you need to get started.