I have a fun little idea for you today. I have had these glasses in my brain for ages to make. It all started when I had (3) friends in a row with wonderful news (new careers, new homes and new babies) and I was trying to find a small little congratulations gift.
I tend to default to jars of champagne gummy bears as a congratulations gift but sometimes I want something more substantial to give and the idea to make these pretty etched glasses came to be. I actually saw something similar in a high end kitchen store but the glasses were a little out of my price range at $25 each.
Luckily, custom etching is incredibly simple to do and I purchased these glasses for about $5 each. Far more affordable!
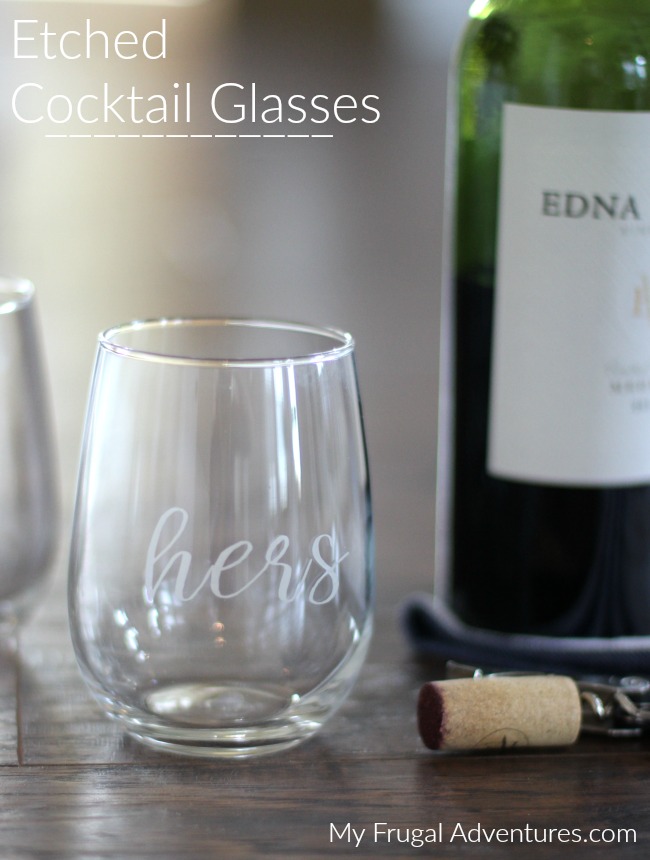
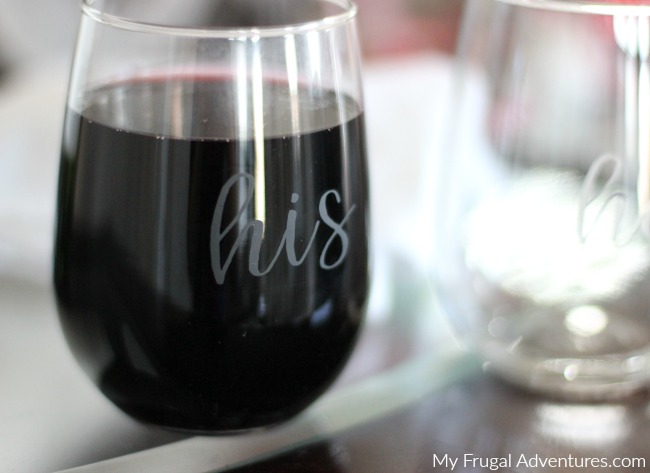
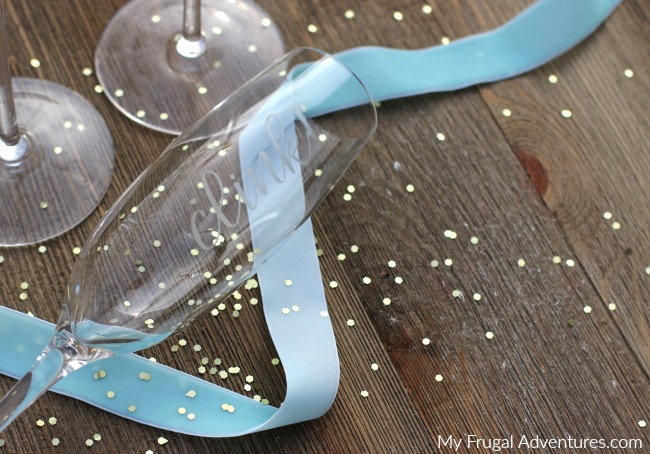
My favorite are these champagne flutes that say Cheers! Pop! Clink! Fizz! but the wine glasses that say his and hers are so fun too for housewarming or a wedding gift or anniversary gift.
I thought about adding Bottom’s Up or Cheers! to the wine glasses or maybe Mr. and Mrs. for a wedding gift.
Ready to customize your own glasses? Here we go:
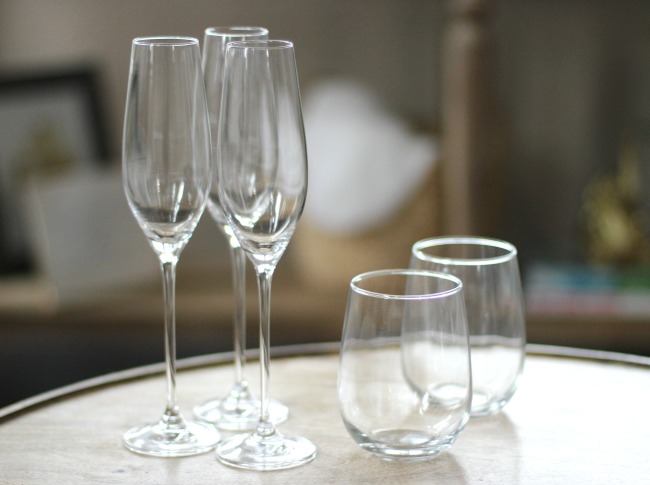
I started with plain wine glasses and champagne flutes. You can make stemless champagne flutes too which are fun. I personally prefer well chilled champagne so the stem flutes are my preference.
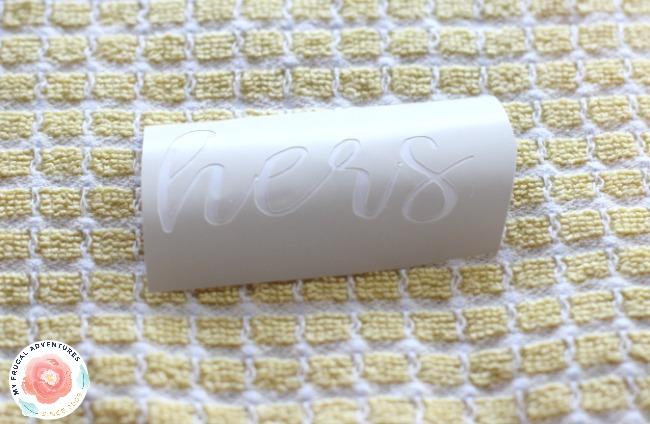
You also need a vinyl stencil. If you have a Cricut machine or Silhouette machine, you are good to go. These are simple to make and customize in the size and font you like. If you do not have a machine, you can check etsy for custom vinyl stencils and potentially buy one.
Note you want a high quality vinyl for this project or the etching cream will smear and make a mess. I used a cheap vinyl I have never liked for my first glass and the results were dreadful. I tried again with a high quality, basic Cricut vinyl and got near perfect results.
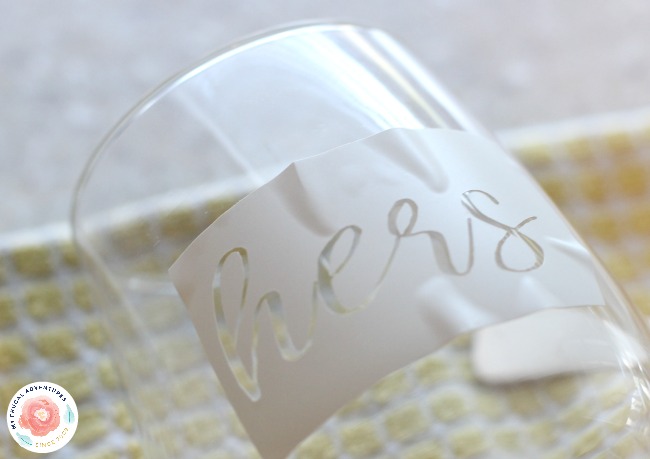
I did learn a few little tricks here and there. The first is to trim the vinyl closer to letters. When I cut generous squares around the letters I wanted to etch in, I had a hard time smoothing out all the bubbles. Any bubbles that pop up like the one above the e pictured, can cause the etching cream to smear under the vinyl. You don’t want to cut too close to the letters though because that makes it harder to smooth on the cream. You can really be sure you keep the cream exactly where you want it but using painter’s tape around the vinyl.
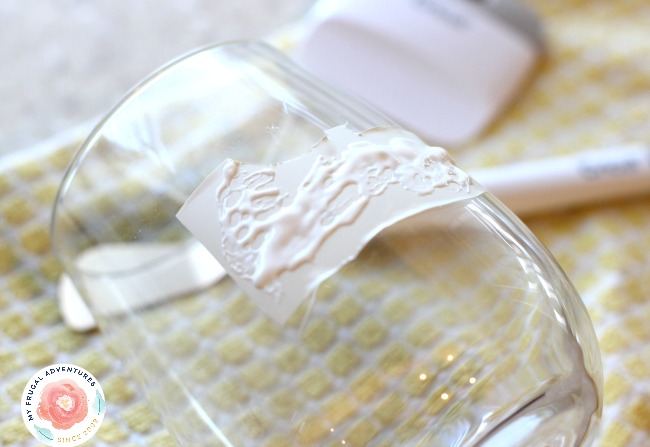
Generously apply the etching cream- I used a paint brush to really be sure it was coated thoroughly and evenly. You have to be very careful at this point to keep all the cream on the vinyl- any accidentally smeared outside of the vinyl should be rinsed off immediately. This is also a good time to use gloves and goggles just in case. You do not want this on your skin.
I like to let the cream sit for about 15 minutes on my glass and then I immediately rinse the cream off.
Once the cream is completely gone, peel off the vinyl and you are done!
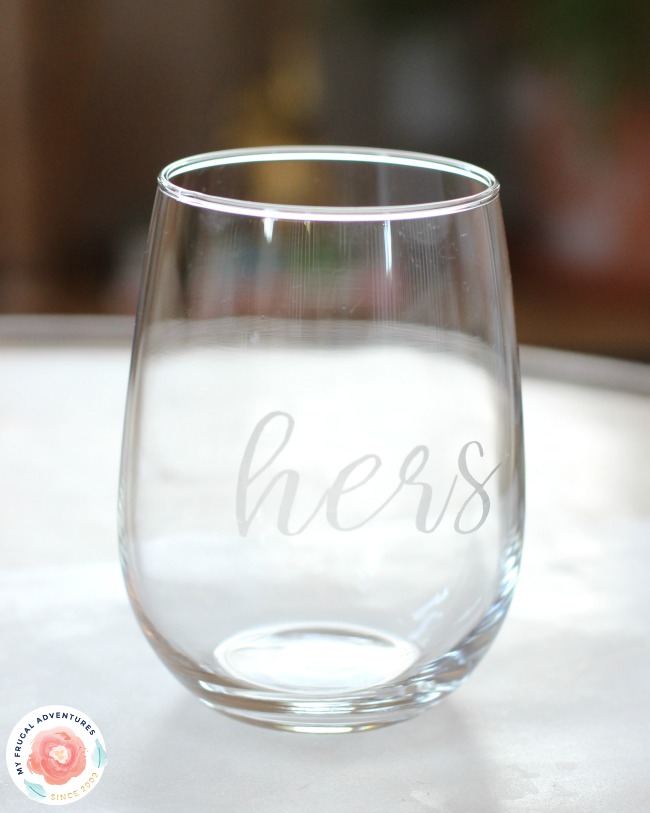
Cute right? Totally dishwasher or hand wash safe- this won’t peel off or chip off. And pop this in a gift basket with some champagne- simple and pretty and a wonderful gift.
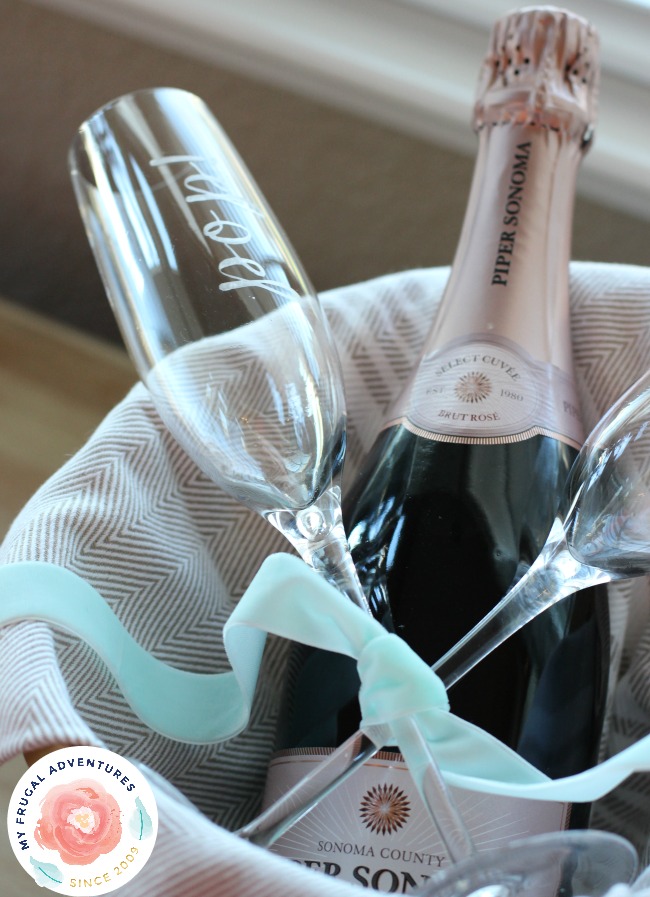
Here are the champagne glasses-
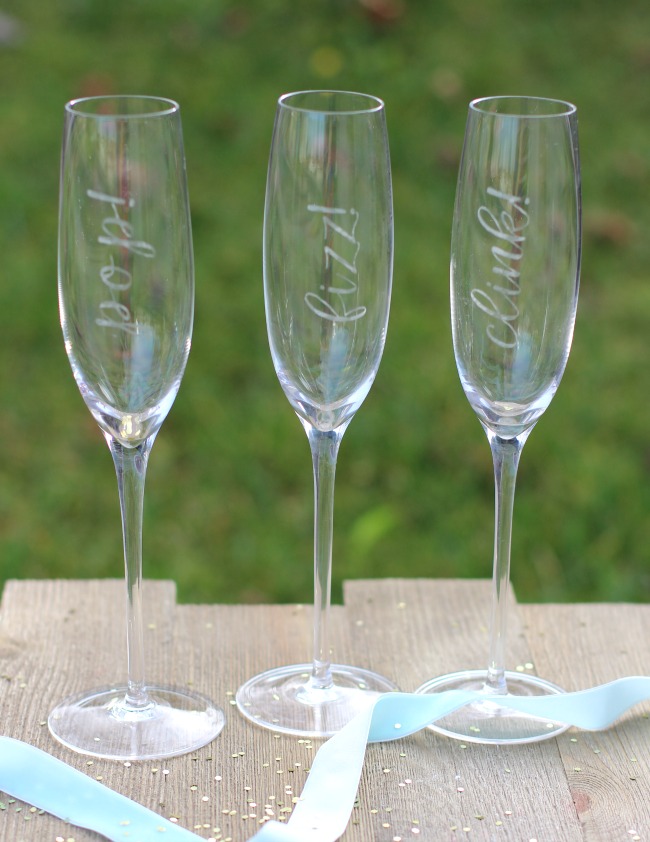
I found these incredibly challenging to photograph so I do believe these glasses actually look better in person.
Here are a few supplies I mentioned in the post above:
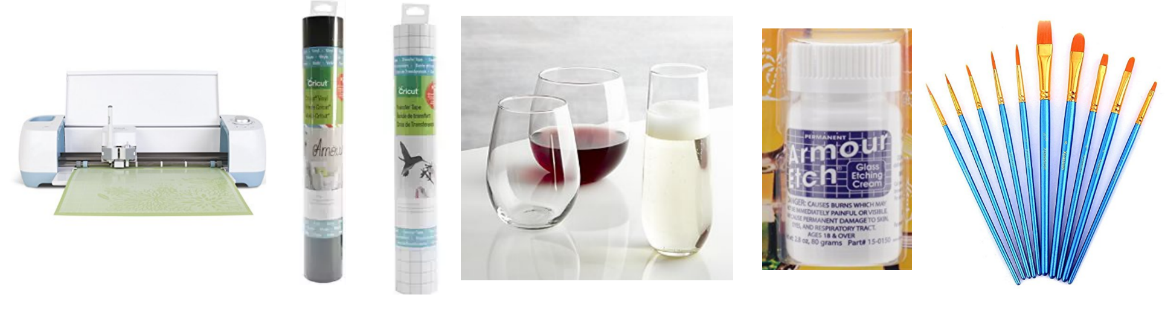
Cricut// Vinyl // Cricut Transfer Tape // Wine Glasses and Champagne Flutes // Etching Cream (this lasts forever so get the small one) // Brushes
If you like this project, here are a few others you might also enjoy:

Leave a Reply