
I have been wanting to try making my own candles for a long time… I actually intended to make citronella ones over summer and just never did get around to making them.
I came home with a pretty painted pot recently from an event and got to thinking that it would be perfect for a homemade candle- so time to get going on this project.
I could not believe how easy it was to make candles! I used soy wax and soy is often pricey for candles at the store- plus you can scent them with anything you like, add colors and use all sorts of fun containers. If you can make a cup of hot tea, you can make perfect homemade candles. It is really that easy.
I think these are gorgeous for little homemade gifts and pretty inexpensive. This is a great project for those of you with girls or teens that might want to do fun things for their friends this year- you can do this together and have something pretty and practical to give.
To get started you need a few things- there are actual candle making kits you can find online here or at the craft stores for about $29.
I found I didn’t really need everything in the kits for my candles but that is completely up to you. I found buying each item separately was a lot more economical.
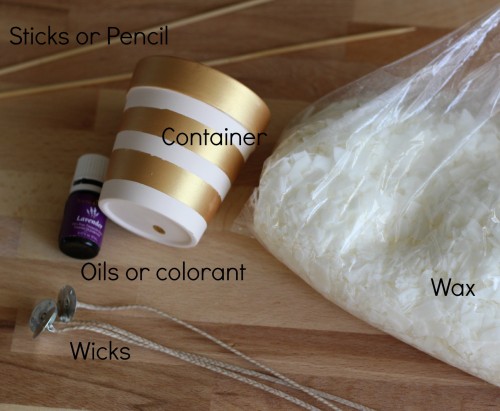
Here is what I used:
- Soy Wax chips- find these at Michaels or order online here*
- Wicks for the size container you want to use (find at Michael’s or online here)- there are different sizes according to how tall your candle will be
- Microwave safe container to melt wax- I used an old mason jar
- Stick, straw or pencil
- Hot Glue or adhesive dot
- Containers for your candles (Jars or tea cups or vintage tins or anything works! I used quilted mason jars)
- Colorant (I skipped this but you can find various colorant here or at Michael’s)
- Fragrance (I used assorted therapeutic grade essential oils for mine. There are also fragrances available at Michael’s or online here)
*You can buy wax in blocks or chips but the chips melt super fast and are easier to use.
First I took a standard mason jar and you need to put the wick in first. The wick needs to stay in place in the center as you pour hot wax over it so a small dab of hot glue or a glue adhesive dot or something else along those lines is perfect. School glue is probably not strong enough.
You want to take one of your wicks and hot glue just a dab to the bottom of the wick and into the center of your container.
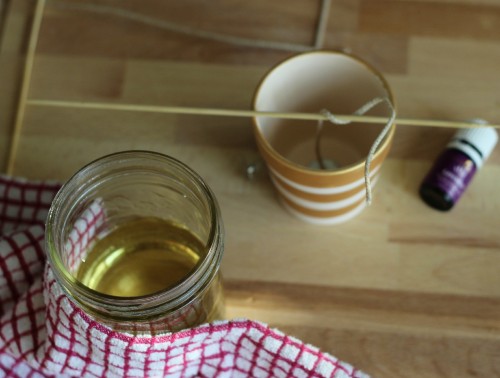
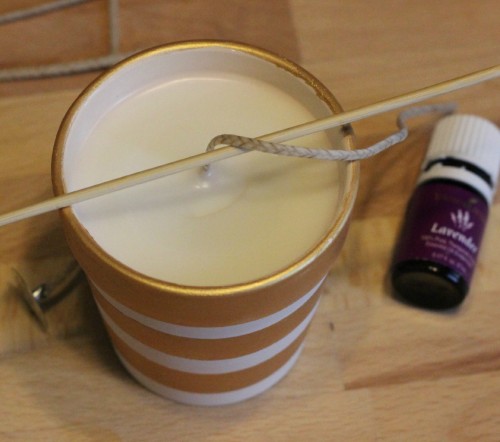
Next take a pencil, skewer, stick or straw and lay it flat over the top of your container and take the end of the wick and twist it around. This will make sure your wick stays nicely centered when you pour in wax.
Now you can actually melt the wax- I used a mason jar but please note there a chance you will have coloring, fragrance or wax stuck to your container so be sure to use something you won’t be upset to throw away. This might be a good time to recycle a jam jar or pasta sauce jar or pickle jar or something (as long as it doesn’t have any odor). My mason jar is perfectly clean after a visit to the dishwasher but better safe than sorry.
Next you want to place approximately double the wax into your container than you need for the jar. So if my container is 4oz, I would add about 8 oz of wax. This does not need to be exactly perfect measurements and you might be limited by the size of the container you use the melt the wax. Don’t worry you can always add more. Pop the wax into the microwave in 30 second intervals until it is completely melted.
Note: This is hot wax. You want to be very careful not to spill and be sure to use hot pads or something to protect your hands as you remove the container of wax.
Pour the melted hot wax into your container of choice being careful not to disrupt the wick that should be resting in the center.
Add a few drops of your coloring (if desired) and stir. Next add the fragrance. I made one candle with Young Living Lavender oil, one candle with Young Living Christmas Spirit oil and one with Valor oil. I found I needed a lot of oil- maybe 20 drops or so per candle. Stir well.
Repeat the process if you find you need more wax and stir well.
Set the candle aside to cool for a few hours. You might gently bang the jar on the counter if you happen to see any little bubbles in the wax. Those will show when it cools. Trim the wick down to the correct size.
And you are done! Can you believe how easy that was?
And guess what? If you somehow blew it and completely messed up your candle no worries at all. You can put your container back into the micro and melt that wax and it will reduce to liquid and you can start again.
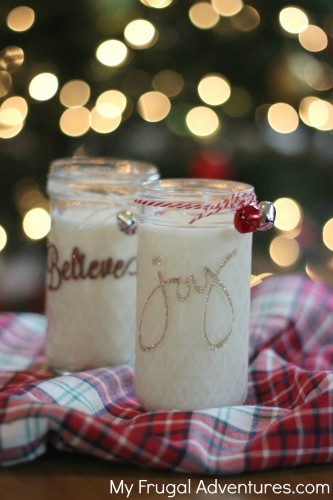
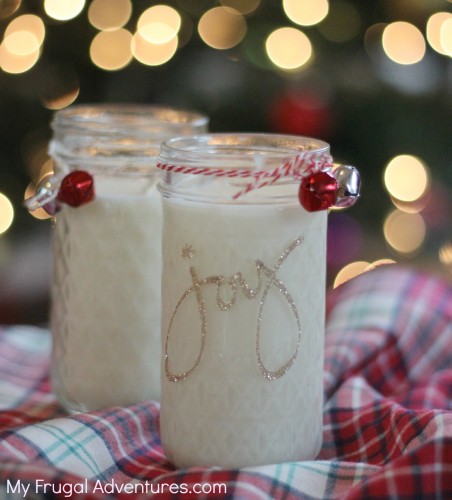
To just finish off the little quilted mason jar candles, I cut Joy and Believe out with double stick adhesive from my Silhouette Cameo and used Gold and Red glitter. I added jingle bells and twine around the rim and they are perfect for gift gifting! I didn’t find the need to seal the glitter since the Silhouette adhesive sticks really well but you can go over it with Mod Podge if you want to be sure the glitter doesn’t come off.
If you don’t have a Silhouette no worries. These are really lovely plain or you can find zillions of stickers and embellishments at Michael’s right now!
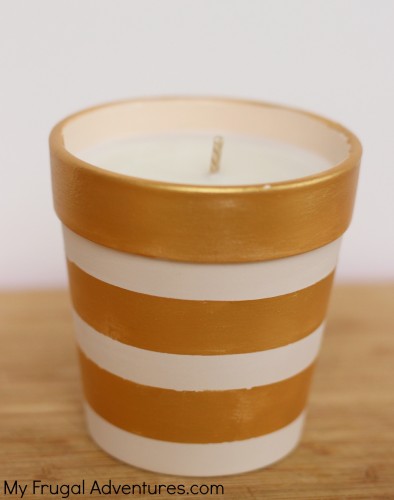
Oh and one last PPS: In the process photos above you can see the little pot I made at an event I went to. It was just these small clay pots– you need to find pots without a hole in the bottom. I couldn’t find them at craft stores or home improvement stores. I quickly taped washi tape in circles around the pot- didn’t even measure just eyeballed it. Then I used a foam brush and Inka Gold paint (which is really amazing and dries in seconds).
Here are what the pots look like- this looks Kate Spade-ish to me and I love it on my desk. I made this one with my favorite Young Living Peppermint oil.
Looks like something I will try in the near future you had great instructions and the pictures was great Thanks
Awesome! Thank you June 🙂
Absolutely adorable!